Medication stains can become permanent within seconds if you don’t act immediately. You’ll want to blot the stain gently, then flush it with cold running water from the back of the fabric for 60–90 seconds. Never use heat during initial treatment, as it bonds pigments permanently to fibers. Home remedies like vinegar, baking soda, and hydrogen peroxide target residual discoloration effectively. The complete step-by-step breakdown ahead covers every technique you’ll need.
Key Takeaways
- Act within 60 seconds by blotting gently with a white cloth and flushing the stain with cold running water immediately.
- Identify the medication type—water-soluble, oil-based, or dye-containing—to choose the most effective stain removal method.
- Apply equal parts white vinegar and water, letting it saturate the stain for 5–10 minutes before rinsing.
- Use oxygen-based bleach with regular detergent at the warmest safe temperature to break down stubborn residual stains.
- Always air dry and visually inspect the fabric before using a dryer to prevent permanently setting remaining stains.
Why Medication Stains Set Into Fabric So Fast

Medication stains penetrate fabric fibers faster than most household stains because many formulations contain synthetic dyes, alcohol carriers, or protein-binding compounds that react chemically with textile fibers within minutes of contact.
Understanding stain chemistry lets you act with precision rather than guesswork. Alcohol-based carriers evaporate rapidly, pulling pigment molecules deeper into the fiber matrix before you can intervene.
Understanding stain chemistry transforms reactive panic into calculated, precise action before pigment molecules disappear permanently into fabric fibers.
Protein-binding compounds bond to natural fibers like cotton and wool almost immediately, making delayed treatment markedly less effective. Heat accelerates this bonding process, which is why proper fabric care requires cold water during initial flushing.
You’re working against a timed chemical reaction, so every minute you delay reduces your removal success rate considerably.
Blot and Flush the Medication Stain Before It Sets
Acting within the first sixty seconds after contact dramatically improves your removal outcome. Your blot techniques and flush methods determine whether the stain binds permanently to fibers or releases cleanly.
Apply these steps immediately:
- Blot gently using a white cloth with light pressure, lifting residue without driving it deeper into the fabric matrix.
- Identify the medication type from packaging—water-soluble, oil-based, or dye-containing—since this dictates your flush methods.
- Hold the garment face-down under cold running water for 60 to 90 seconds, flushing from the back outward.
Avoid rubbing and never use hot water, as heat sets protein-based and dye-containing compounds permanently.
Cold water and controlled blot techniques give you maximum leverage before chemical bonding occurs.
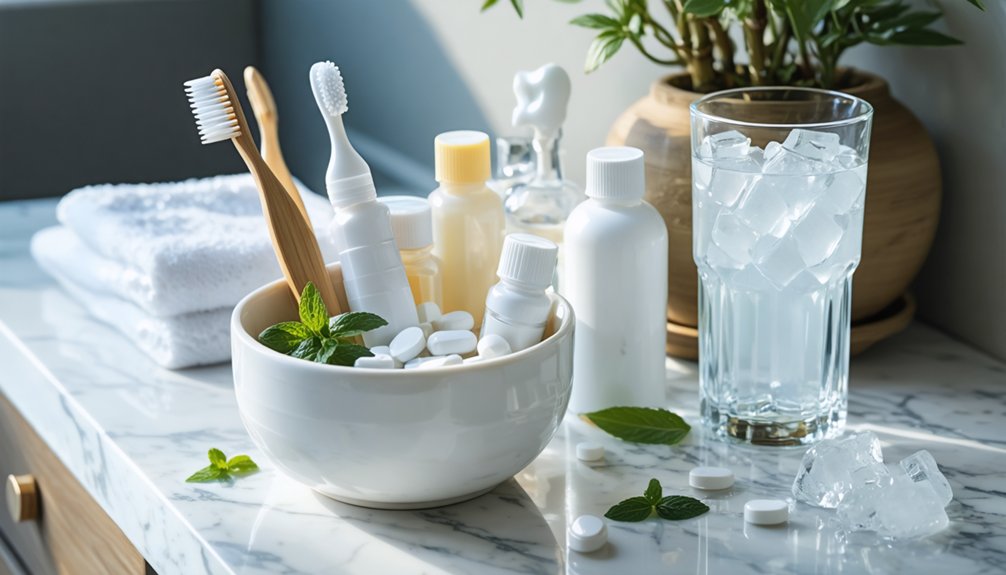
Treat Medication Stains With Vinegar, Baking Soda, or Peroxide
Once you’ve flushed the stain, mix equal parts white vinegar and water, then apply the solution directly to the affected area.
For stubborn dye-based discoloration, apply a baking soda and white vinegar paste, letting it fizz for 15 minutes to break down chromophores embedded in the fabric.
If the stain persists on white or colorfast fabric, dip a cotton swab in 3% hydrogen peroxide and blot the area for two to three minutes before rinsing thoroughly with cold water.
Vinegar Solution Mixing Steps
When treating medication stains with household solutions, you’ll want to start by mixing equal parts white vinegar and water in a clean bowl to create a mild acidic solution.
Vinegar benefits your cleaning techniques by breaking down dye and protein residue without damaging most fabric types.
Apply the solution directly to the stain, then follow these precise steps:
- Let the vinegar solution saturate the stained fibers for 5 to 10 minutes before agitating.
- Blot firmly with a white cloth, working inward from the stain’s outer edge to prevent spreading.
- Rinse thoroughly with cold water to remove acidic residue before proceeding to laundering.
Avoid skipping the rinse step, as residual acidity can weaken fabric fibers over repeated exposures.
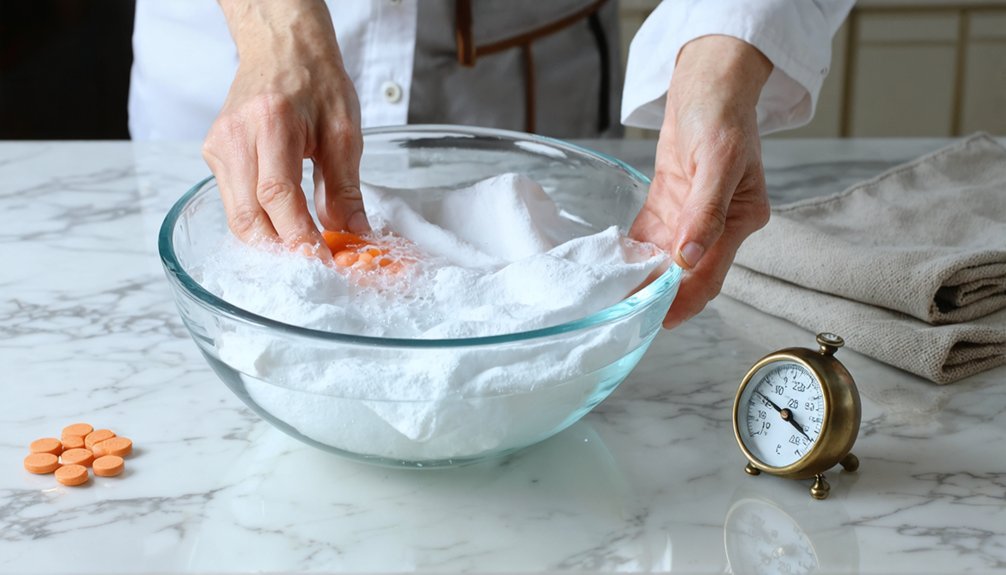
Baking Soda Stain Fizzing
Baking soda combined with white vinegar produces a fizzing reaction that lifts stubborn dye stains from fabric fibers through carbon dioxide agitation. Among practical baking soda uses, this application targets medication dye residue that resists standard rinsing.
To execute this method, apply baking soda directly onto the dampened stain, then pour white vinegar over it. The resulting fizzing reaction mechanically disrupts dye molecules embedded in the fiber matrix.
Let the paste sit undisturbed for 15 minutes to maximize agitation and penetration. You’ll notice active bubbling throughout this dwell period, which confirms the chemical reaction is working.
After 15 minutes, blot the loosened residue with a clean cloth, then rinse thoroughly with cold water before laundering according to your garment’s care label.
Peroxide Application Technique
Three percent hydrogen peroxide works as a targeted oxidizing agent for medication stains on white or light-colored fabric. Its peroxide effectiveness comes from releasing oxygen radicals that break down chromophores without degrading fiber integrity.
Follow these stain removal tips precisely:
- Dip a cotton swab into 3% hydrogen peroxide and apply directly onto the stained area only.
- Allow the solution to dwell for two to three minutes while oxidation disrupts the discoloration compounds.
- Rinse thoroughly with cold water to remove all residual peroxide before proceeding to final laundering.
You should never apply peroxide to dark or non-colorfast fabrics, as it’ll cause irreversible bleaching.
Always inspect the treated area before heat exposure to confirm complete stain removal.
Wash the Medication Stain at the Right Temperature for Your Fabric
Before washing, check your garment’s care label to identify the safest maximum water temperature for the fabric.
Wash at the warmest temperature the label allows, since higher heat improves detergent efficacy and breaks down residual medication compounds more effectively.
If the stain persists after pre-treatment, add an oxygen-based bleach to the wash cycle, selecting a color-safe formula for dyed fabrics and a standard formula for whites.
Read Care Label First
Always check the care label before washing a medication-stained garment, as it specifies the maximum safe water temperature your fabric can tolerate. Ignoring these fabric care instructions risks permanent fiber damage and accelerates stain setting.
Follow these label-based protocols for effective stain prevention:
- Match water temperature precisely — use the highest temperature the label permits to maximize detergent activation without degrading fabric integrity.
- Identify fiber composition — synthetic blends require cooler water, while cotton and linen tolerate warmer wash cycles that better dissolve medication residue.
- Note special handling symbols — hand-wash or dry-clean-only designations require alternative treatment methods rather than machine laundering.
You’re making a critical error if you skip this step. The label eliminates guesswork and guarantees your cleaning approach targets the stain without compromising the garment.
Choose Correct Water Temperature
Water temperature directly controls how effectively your detergent activates and how your fabric responds during the wash cycle. Always check your care label before selecting a setting, since different fabric types tolerate different thermal thresholds.
Cold water suits delicates and dark fabrics, preventing dye bleed and fiber distortion. Warm water, typically 90–110°F, optimizes enzymatic detergent activity for synthetic blends and moderately soiled cotton.
Hot water, 120–140°F, works on white cotton and heavily stained linens but risks shrinkage and color loss in sensitive fabric types. Avoid hot water on protein-based or dye-containing medication stains during initial treatment, as heat permanently sets residue into the fiber matrix.
Match water temperature precisely to both your fabric’s tolerance and the stain’s chemical composition for maximum removal efficiency.
Add Oxygen-Based Bleach
Oxygen-based bleach strengthens your wash cycle’s stain-removal power without degrading color-safe or white fabrics the way chlorine bleach does.
When pre-treatment alone doesn’t fully neutralize medication discoloration, oxygen bleach application delivers the targeted oxidation needed to break down residual chromophores embedded in the fiber matrix. Its oxygen bleach benefits extend across cotton, synthetics, and blends without compromising dye integrity.
Follow this precise application protocol:
- Add oxygen-based bleach directly to the detergent compartment alongside your regular detergent before starting the cycle.
- Select the warmest water temperature your fabric’s care label permits to activate the bleach’s oxidizing agents fully.
- Run a complete wash cycle and inspect the garment before transferring it to the dryer.
Never apply heat until discoloration is fully eliminated.
Air Dry First to Confirm the Medication Stain Is Fully Gone
Before placing your garment in the dryer, air dry it completely to confirm the stain is fully removed. Heat permanently sets residual discoloration into fabric fibers, eliminating any chance of successful retreatment.
Stain confirmation requires visual inspection under natural or bright artificial light once the fabric is fully dry.
Lay the garment flat or hang it in a well-ventilated area and allow complete evaporation. Once dry, examine the previously stained zone closely. If darkening, shadowing, or discoloration remains, repeat your pre-treatment protocol before laundering again.
Never assume a wet garment is stain-free, as moisture masks residue effectively.
Only after achieving a clean, dry, visually confirmed result should you apply heat. This step keeps you in full control of the outcome.
Remove Stubborn Medication Stains With Targeted Chemical Treatments
Stubborn medication stains that survive standard laundering require targeted chemical intervention to break down bound chromophores and residual dye complexes embedded in fabric fibers.
Matching treatment to your stain’s chemical properties guarantees precise, effective stain removal without fiber degradation.
- Apply an enzymatic pretreatment containing 0.3% neutral protease and 0.2% alpha-amylase at pH 7.0–7.4 to dissolve protein-based residues.
- Use a 1% L-cysteine solution for three minutes to reduce disulfide bonds and release bound chromophores from fiber matrices.
- Blot 3% hydrogen peroxide onto the affected area for two to three minutes, then rinse thoroughly with cold water.
After each chemical application, flush with cold water to neutralize residual agents before proceeding to final laundering.
Don’t skip this step.
Frequently Asked Questions
Can Medication Stains Transfer Onto Other Garments During Washing?
Yes, medication stains can transfer onto other garments during washing. You’ll protect your fabric care routine by washing stained items separately and pre-treating them first—essential stain prevention steps that keep dye from migrating to clean clothing.
Does Fabric Color Affect Which Stain Removal Method Works Best?
Yes, fabric color directly determines your method. You’ll need colorfastness testing before applying hydrogen peroxide or lemon juice—these suit whites only. Confirm dye compatibility when selecting oxygen bleach or vinegar solutions for colored garments to prevent irreversible discoloration.
Are Medication Stains Covered Under Clothing Manufacturer Warranties?
Warranties won’t cover what you’ve caused. Clothing manufacturers consistently classify medication stains as user-inflicted damage, placing them outside warranty limitations. You’ll secure your garments best through proactive stain prevention strategies rather than relying on manufacturer protection policies.
Can Dry Cleaning Remove Medication Stains Better Than Home Washing?
Dry cleaning effectiveness depends on medication stain types. For oil-based stains, you’ll find dry cleaning superior, but for water-soluble or dye-based medications, home washing with cold water flushing and enzymatic pre-treatment typically outperforms solvent-based methods.
Do Medication Stains Smell After Treatment if Not Fully Removed?
Like a ghost that won’t leave, stain persistence can trap odor-causing residue in fibers. If you haven’t fully removed the stain, you’ll notice lingering smells. Repeat pre-treatment and air dry completely for odor elimination.
References
- https://www.youtube.com/watch?v=B7Xip90iKk8
- https://www.hunker.com/13423469/stain-removal-tips-for-orange-dye-in-medicine/
- https://www.thespruce.com/how-to-remove-liquid-medicine-stains-2146975
- https://lifetips.alibaba.com/laundry-secrets/how-to-remove-liquid-medicine-stains
- https://alldiysolutions.com/how-to-remove-liquid-medicine-stains-from-clothes/
- https://www.npr.org/2019/12/17/789172148/how-do-i-get-this-out-your-guide-to-stain-removal
- https://site.extension.uga.edu/textiles/care/stain-removal/remove-stains-from-medicine-acne-mercurochrome-cough-syrup-iodine/
- https://smart.dhgate.com/effective-methods-to-remove-medicine-stains-from-clothes-a-step-by-step-guide-for-quick-and-safe-cleaning/
- https://play.google.com/store/apps/details?id=com.mgsoft.stainsolutions&hl=en_AU
- https://knyamed.com/blogs/resources/how-to-remove-common-healthcare-stains-from-your-medical-apparel