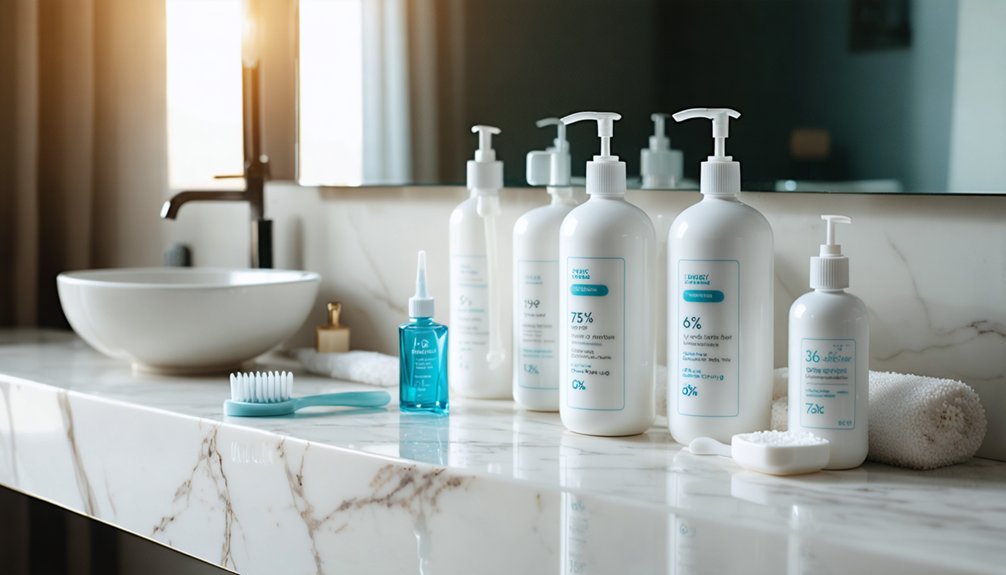
Peroxide-based tray kits are your best home option for treating fluoride stains because they penetrate beneath the enamel surface where stains originate. Carbamide peroxide gels at 10%–22% concentration chemically break down intrinsic discoloration through oxidation, something abrasives and whitening strips can’t achieve. Top-performing kits include CustMbite Smile Whitening Kit and Vista Apex. Matching concentration to your stain severity and sensitivity level determines how effective your results will be—and there’s considerably more to know before choosing.
Key Takeaways
- Carbamide peroxide tray kits are most effective for fluoride stains, with top options including CustMbite Smile Whitening Kit and Vista Apex.
- Tray kits outperform strips by ensuring consistent peroxide contact across uneven fluorosis spots, including curved edges and interproximal zones.
- For mild staining, use 10%–15% carbamide peroxide; for moderate-to-severe fluorosis, choose 16%–22% concentration for faster results.
- Hydrogen peroxide alternatives like Opalescence Go offer 10%–15% concentration, requiring daily 15–30 minute sessions for intrinsic fluorosis treatment.
- Manage sensitivity using potassium nitrate gels, fluoride-containing products, or shorter wear sessions without reducing treatment effectiveness.
Why Peroxide Kits Work Better on Fluoride Stains
Fluorosis stains form within the enamel structure itself, which is why surface-level products rarely produce meaningful results. Abrasives and natural remedies can’t penetrate enamel deeply enough to address intrinsic discoloration.
Peroxide advantages become clear here: bleaching agents break down stain molecules chemically, working beneath the surface rather than simply polishing it.
When you apply a carbamide or hydrogen peroxide gel, oxidation drives stain breakdown at the molecular level, disrupting the discolored compounds embedded within enamel. That’s a mechanism no scrub-based product can replicate.
You should also expect some initial contrast increase early in treatment. Fluorosis patterning may temporarily appear more pronounced before whitening progresses. That’s normal.
Staying consistent with your chosen kit’s protocol is what ultimately drives visible, lasting improvement.
Tray Kits vs. Strips for Fluoride Stains: Which Covers Better?
When you use a tray-based whitening kit, the gel conforms closely to each tooth’s surface, delivering consistent peroxide contact across fluorosis spots that vary in size and placement.
Strips, by contrast, press flat against teeth and often miss recessed or textured enamel areas, leaving uneven results on the patchy discoloration that fluorosis typically produces.
If your fluorosis affects multiple front teeth with irregular spotting, a tray system generally gives you more reliable full-surface coverage than strips can provide.
Tray Coverage Explained
Two main delivery formats compete for your attention when treating fluoride stains at home: tray kits and whitening strips.
Tray application techniques determine how evenly peroxide gel contacts your enamel surface. Strips rely on adhesive contact, which often misses irregular fluorosis textures.
Tray coverage effectiveness depends on three key factors:
- Custom or semi-custom fit — conforming trays press gel consistently against curved tooth surfaces.
- Gel viscosity — thicker carbamide peroxide gels stay positioned without spreading onto gum tissue.
- Wear duration — longer controlled contact time allows peroxide to penetrate mixed-depth fluorosis discoloration.
Strips can’t replicate this uniform contact.
If your fluorosis appears patchy or textured, a tray system gives you more precise, repeatable control over whitening outcomes.
Strips and Uneven Results
Why does strip format matter so much when you’re targeting fluoride stains specifically? Fluorosis produces irregular, patchy discoloration across enamel surfaces, and strip effectiveness depends entirely on consistent gel-to-tooth contact.
Strips conform reasonably well to flat surfaces but lose contact around curved edges, textured spots, and interproximal zones—exactly where fluorosis patterning tends to cluster.
That inconsistent contact produces uneven whitening, meaning some areas brighten while others remain discolored. You end up with a patchwork result rather than uniform improvement.
Tray systems push gel across the entire visible surface, including contoured areas strips can’t reliably reach. If you’re managing moderate-to-severe fluorosis, strips introduce a structural limitation that no application technique fully compensates for, making tray-based delivery the more controllable and predictable format.
Choosing Your Best Option
Deciding between a tray kit and whitening strips comes down to how each format delivers gel across irregular enamel surfaces. Fluorosis discoloration is often patchy and uneven, making full coverage critical. Tray systems conform closely to tooth contours, distributing peroxide gel more uniformly than strips can across textured spots.
When applying at-home techniques, prioritize these enamel safety factors:
- Select carbamide peroxide concentrations between 10%–22% for controlled, gradual release.
- Use custom or semi-custom trays to minimize gel slippage onto gum tissue.
- Choose formulas containing fluoride additives to buffer sensitivity during treatment cycles.
If fluorosis staining is deep or resistant after consistent tray use, professional evaluation becomes the appropriate next step rather than increasing peroxide concentration independently.
Best Carbamide Peroxide Kits for Fluoride Stains at Home
When tackling fluoride stains at home, carbamide peroxide kits give you a practical advantage because the compound breaks down slowly into hydrogen peroxide and urea, releasing bleaching agents gradually into the enamel where intrinsic fluorosis discoloration develops.
Leading options like the CustMbite Smile Whitening Kit at 22% carbamide peroxide and the Vista Apex Fluorescent take-home kit at 16% or 22% represent the stronger end of the consumer spectrum, with the latter including fluoride to help manage sensitivity during treatment.
Choosing the right strength means balancing how stubborn your staining is against your sensitivity tolerance, since higher concentrations work faster but carry a greater risk of discomfort if you exceed recommended wear times.
How Carbamide Peroxide Works
Carbamide peroxide works through a two-stage chemical breakdown: it first splits into hydrogen peroxide and urea, then the hydrogen peroxide further decomposes into oxygen radicals that penetrate enamel and disrupt the molecular bonds holding stain compounds in place.
This mechanism directly targets intrinsic fluorosis discoloration, where surface-only abrasives fail.
Key carbamide benefits that support whitening effectiveness include:
- Gradual release — slower decomposition extends active contact time with stained enamel
- Depth penetration — oxygen radicals reach subsurface stain molecules that polishing can’t access
- Reduced sensitivity risk — lower peak peroxide concentration minimizes pulpal irritation compared to equivalent hydrogen peroxide strengths
These properties make carbamide peroxide particularly suited for overnight or extended-wear tray protocols, giving you precise control over treatment duration and dosage.
Top Carbamide Peroxide Kits
Two kits stand out for at-home fluorosis treatment: the Vista Apex Fluorescent take-home kit and the CustMbite Smile Whitening Kit.
Vista Apex offers 16% or 22% carbamide peroxide with added fluoride, which directly targets intrinsic staining while reducing sensitivity risk.
CustMbite delivers 22% carbamide peroxide gel alongside an 8% carbamide peroxide foam for sensitivity-prone users.
The carbamide benefits here are measurable: slower peroxide release means you’re exposing enamel to bleaching agents more gradually, lowering irritation risk without sacrificing efficacy.
For application techniques, load trays evenly, avoid overfilling to prevent gum contact, and follow the manufacturer’s wear-time guidelines precisely.
Both kits use tray delivery systems, giving you consistent gel-to-tooth contact across anterior surfaces where fluorosis patterning is most visible.
Choosing The Right Strength
Selecting the right peroxide concentration depends on both the severity of your fluorosis staining and your baseline tooth sensitivity. Fluoride exposure during enamel development creates intrinsic discoloration that responds differently across concentration ranges. Match your choice to your situation:
- Mild staining or sensitive teeth – Start with 10%–15% carbamide peroxide to minimize irritation while preserving enamel integrity.
- Moderate staining with manageable sensitivity – Use 16%–22% carbamide peroxide for accelerated stain breakdown within the enamel structure.
- Severe or stubborn fluorosis – Consider dentist-supervised 22% carbamide peroxide gel before pursuing professional intervention.
Carbamide peroxide releases hydrogen peroxide gradually, reducing sensitivity spikes compared to faster-acting systems.
If sensitivity persists beyond initial sessions, drop to a lower concentration rather than discontinuing treatment entirely.
Best Hydrogen Peroxide and LED Kits for Fluoride Stains
Hydrogen peroxide and LED tray kits offer two practical options for addressing fluoride stains at home, each with distinct concentration ranges and use patterns worth understanding before you commit to one.
Prefilled hydrogen peroxide trays, like Opalescence Go, use 10%–15% hydrogen peroxide with daily sessions of 15–30 minutes, delivering solid peroxide effectiveness against intrinsic fluorosis discoloration.
Prefilled trays like Opalescence Go deliver 10%–15% hydrogen peroxide, tackling intrinsic fluorosis discoloration in just 15–30 minutes daily.
LED tray systems pair lower concentrations, typically 6%–8% hydrogen peroxide, with light activation to compensate for reduced gel strength. The LED advantages include shorter or more flexible session times, with some protocols running just 8 minutes three times daily.
If your staining is moderate to severe, prioritize higher hydrogen peroxide concentrations over LED convenience, since light alone doesn’t substitute for adequate bleaching agent contact with enamel.
How to Choose the Right Peroxide Strength for Fluoride Stains
Choosing the right peroxide strength comes down to your stain severity, sensitivity threshold, and how quickly you need results. Fluorosis stains are often intrinsic, so peroxide concentration directly affects how deeply the bleaching agent penetrates enamel.
- 10%–15% carbamide or hydrogen peroxide — Best for mild-to-moderate fluorosis with sensitivity concerns; longer treatment duration produces gradual improvement.
- 16%–22% carbamide peroxide — Suited for moderate-to-severe staining when you need measurable results faster; monitor for gum or pulp sensitivity.
- 6%–8% hydrogen peroxide — Lower-risk entry point for sensitive teeth; extended treatment duration compensates for reduced peroxide concentration.
If home kits at any strength fail to produce adequate change within the recommended cycle, professional evaluation is your next step.
Ingredients and Timing Strategies That Cut Whitening Sensitivity
Once you’ve locked in the right peroxide strength, managing sensitivity becomes the next variable that determines whether you’ll stay consistent with your whitening routine.
Fluoride-containing gels, like those in the Vista Apex take-home kit, directly support sensitivity reduction by reinforcing enamel during treatment. Potassium nitrate is another ingredient with demonstrated effectiveness—it calms nerve response without compromising ingredient effectiveness of the peroxide itself.
On the timing side, shorter wear sessions spaced across multiple days outperform long single sessions for sensitive teeth. Carbamide peroxide‘s slower release rate gives your enamel recovery time between applications.
If irritation develops, drop to every other day rather than stopping entirely. Avoid acidic rinses or charcoal products on whitening days, as they compound enamel stress and undermine your results.
Lower-Cost Options for Mild Fluoride Stains
For mild fluorosis staining, three lower-cost home options consistently deliver measurable surface improvement without the investment of a professional tray kit.
- Baking soda toothpaste — mild abrasion removes surface deposits without significant enamel loss when used several times weekly.
- Whitening toothpaste with mild abrasives — consistent use over two to four weeks reduces superficial yellow-brown discoloration through controlled mechanical action.
- Activated charcoal — adsorbs surface stains effectively, but you should limit frequency due to abrasion risk and avoid daily long-term use.
These options won’t penetrate intrinsic enamel discoloration the way peroxide-based systems do.
If your fluorosis presents as deep white spots or patchy brown areas, lower-cost adjuncts work best alongside a peroxide kit rather than as standalone treatments.
Signs Your Fluoride Stains Need a Dentist, Not a Kit
Home kits handle a wide range of fluorosis discoloration, but certain presentations signal that over-the-counter treatment won’t be enough. When fluoride severity reaches moderate-to-severe levels, you’ll notice deep brown or black pitting, rough surface texture, or white opacities that span most of the enamel surface.
These intrinsic changes exceed what peroxide gels can reliably correct at home.
You should also evaluate your enamel health before committing to repeated whitening cycles. Pitting, chalky spots, or existing sensitivity can worsen under prolonged peroxide exposure without professional monitoring.
If your stains appear uneven, stubborn after two full whitening cycles, or accompanied by structural irregularities, schedule a dental evaluation. A dentist can assess whether microabrasion, resin infiltration, or veneers would produce better outcomes than continued home treatment.
Frequently Asked Questions
Can Fluoride Stains Return After Completing a Home Whitening Kit Treatment?
Yes, fluoride stains can return if you don’t maintain stain prevention habits. You’ll want to explore fluoride alternatives and use whitening maintenance sessions regularly to preserve your results and minimize intrinsic discoloration recurrence.
Are Home Whitening Kits Safe to Use on Children With Fluorosis Stains?
You shouldn’t use home whitening kits on children with fluorosis without a dentist’s approval. Children’s dental development makes home safety a concern, as peroxide concentrations can harm developing enamel and soft tissues unpredictably.
How Long Do Whitening Results Typically Last on Fluorosis-Affected Teeth?
Your results typically last six to twelve months, depending on fluorosis severity and lifestyle habits. You’ll need to adjust whitening frequency with touch-up treatments to maintain improvements, as intrinsic fluorosis stains can gradually resurface over time.
Can Fluoride Stains on Veneers or Crowns Be Whitened at Home?
Like chasing shadows, whitening artificial surfaces won’t work—you can’t bleach veneers or crowns. For veneer maintenance and crown care, you’ll need professional replacement or polishing since peroxide doesn’t penetrate synthetic materials.
Does Diet Affect How Quickly Fluoride Stains Reappear After Whitening?
Yes, your diet directly impacts stain prevention after whitening. You’ll accelerate fluoride stain reappearance by consuming dark beverages, acidic foods, and chromogenic compounds, so avoiding these dietary impacts helps you maintain your whitening results longer.
References
- https://vistaapex.com/product/fluorescent-whitening-doctors-kit/
- https://www.alibaba.com/product-insights/remove-fluoride-stains-teeth.html
- https://www.drckidsdentistry.com/top-5-best-home-whitening-kits/
- https://custmbite.com/pages/teeth-whitening-for-fluorosis
- https://www.forbes.com/sites/forbes-personal-shopper/article/best-teeth-whitening-kit/
- https://www.advancedsmilesmarion.com/resources/best-at-home-teeth-cleaning-kit-guide
- https://www.cvs.com/learn/beauty/oral-care/teeth-whitening-kits
- https://www.amazon.com/home-dental-kit/s?k=home+dental+kit
- https://www.amazon.com/live/video/0898b4ed9cd7481b8e0184cb70f79cc3
- https://www.cnet.com/health/personal-care/best-teeth-whitening-kits/