To brighten your smile affordably, you don’t need to overspend — you need the right strategy. Start with professional whitening to remove deep stains, then maintain results with whitening toothpaste, baking soda, and hydrogen peroxide rinses. Swap stain-causing drinks for lighter options, use a straw, and rinse with water after meals. Build daily habits like brushing twice and flossing consistently. The full method, including the correct sequence, is just ahead.
Key Takeaways
- Brushing twice daily with whitening toothpaste effectively handles surface stains while maintaining overall oral hygiene affordably.
- Baking soda acts as a mild abrasive to scrub surface discoloration without expensive treatments.
- Drinking staining beverages through a straw minimizes direct enamel contact, reducing discoloration buildup over time.
- Rinsing with water immediately after consuming staining foods or drinks limits long-term buildup affordably.
- Oil pulling with coconut oil gradually reduces bacteria and lifts surface stains with minimal cost.
In-Office Whitening Is More Affordable Than You Think
When most people hear “in-office whitening,” they assume it’s out of their budget — but that’s not always the case. Professional whitening ranks among the most cost-effective cosmetic upgrades available, delivering faster, stronger results than most at-home alternatives.
Professional whitening delivers faster, stronger results — and it’s more budget-friendly than most people expect.
The cost-effectiveness becomes clear when you factor in long-term value. Over-the-counter products require repeated purchases, while a single in-office session can lift deep stains in one visit.
Pair that with consistent dental hygiene — brushing twice daily, flossing, and scheduling regular cleanings — and you extend your results significantly.
You’re not just paying for whiter teeth; you’re investing in a controlled, professionally managed outcome.
If you want maximum brightness with minimal guesswork, in-office whitening gives you exactly that kind of precision and results-driven value.
Foods and Drinks That Stain Your Teeth (and Easy Swaps)
Coffee, tea, red wine, and dark berries are among the most common culprits behind tooth discoloration.
If you can’t cut them out entirely, swapping dark beverages for lighter alternatives or drinking through a straw reduces direct contact with enamel.
Rinsing your mouth with water immediately after consuming staining foods or drinks is a simple, no-cost habit that helps limit buildup before it sets in.
Common Teeth-Staining Culprits
A handful of everyday foods and drinks are quietly working against your smile. Certain consumables accelerate discoloration and compromise your oral health faster than you might expect. If you’re experiencing teeth sensitivity alongside visible staining, your enamel may already be weakening from repeated exposure.
The most common culprits include:
- Coffee and tea – Tannins bind to enamel, creating stubborn yellow or brown deposits
- Red wine – Chromogens and tannins penetrate enamel surfaces aggressively
- Tomato-based sauces – High acidity softens enamel while deep pigments stain
- Dark sodas – Combine acid erosion with heavy artificial coloring
Recognizing these triggers puts you in control. Limiting exposure or rinsing with water immediately afterward considerably reduces their cumulative staining effect on your teeth.
Easy Drink Swaps
Swapping just a few daily beverages can meaningfully reduce your stain exposure without sacrificing your routine. Coffee, tea, red wine, and dark sodas are primary discoloration drivers.
Replacing even one daily cup with water reduces cumulative staining and supports healthy gums by limiting sugar and acid exposure. When elimination isn’t realistic, drink dark beverages through a straw to minimize contact with enamel.
Rinse with water immediately after consumption to neutralize residue before it sets. If tooth sensitivity is a concern, avoid acidic drinks like citrus juices or sports drinks, which erode enamel and intensify discoloration over time.
White tea and milk are lower-staining alternatives worth considering. Small, consistent substitutions compound over time, giving you measurable control over your smile’s brightness without costly interventions.
Rinsing After Staining Foods
Rinsing with water after consuming staining foods and drinks is one of the simplest, lowest-cost habits you can build into your routine. It’s a direct stain prevention strategy that requires no products, no appointments, and no cost.
Incorporate these oral hygiene-supporting actions immediately after meals or dark beverages:
- Rinse with water to dilute and wash away pigment-heavy residue before it settles
- Wait 30 minutes before brushing if you’ve consumed acidic foods or drinks to protect enamel
- Use sugarless gum to stimulate saliva flow, which neutralizes acids and clears debris naturally
- Avoid prolonged contact by drinking staining beverages through a straw to reduce surface exposure
Consistency with this habit compounds over time, making it one of the most efficient tools in your whitening strategy.
Daily Habits That Keep Your Whitening Results Longer
Once you’ve achieved your desired results, maintaining them comes down to consistent daily habits. Brush twice daily using a soft-bristled toothbrush and floss at least once to support strong oral hygiene and prevent plaque buildup that dulls your results. Swap your toothbrush every three to four months when bristles fray.
Stain prevention requires discipline around what you consume. Cut back on coffee, tea, and dark beverages, or rinse with water immediately after drinking them. Incorporate crunchy produce like apples and carrots, which naturally scrub surface stains. Chew sugarless gum after meals to stimulate saliva and neutralize acids.
Schedule regular dental cleanings to reinforce your efforts professionally. These appointments remove buildup your brush can’t reach and extend the lifespan of your whitening results markedly.
At-Home Whitening Remedies That Actually Deliver Results
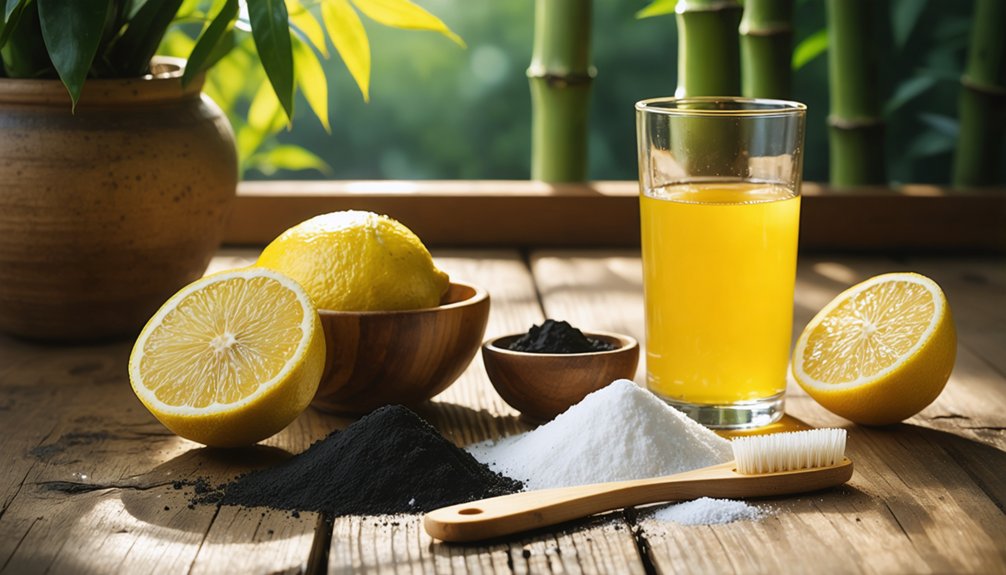
Before spending money on professional treatments, you’ll find several at-home remedies that deliver measurable whitening results. These natural remedies and DIY treatments target surface stains using accessible, low-cost ingredients you likely already have.
- Baking soda — acts as a mild abrasive to scrub away surface discoloration without harsh chemicals.
- Diluted hydrogen peroxide — functions as a bleaching agent when used as a controlled mouth rinse.
- Oil pulling with coconut oil — reduces bacteria while gradually lifting stains from enamel.
- Activated charcoal — absorbs surface stains through its porous structure during brushing.
Apply each method consistently and follow up with water rinsing to protect enamel.
Results build over time when you pair these remedies with disciplined daily brushing habits.
When Whitening Cannot Fix Chips, Cracks, or Discoloration
Whitening treatments target surface stains, but they can’t correct structural damage or intrinsic discoloration. If you’re dealing with chips, cracks, fractures, or deep staining that bleaching agents can’t reach, you’ll need restorative solutions.
Dental bonding applies tooth-colored composite resin directly to damaged areas, repairing chips and reshaping misshapen teeth at a relatively low cost. It’s a practical first-line option when the damage is minor.
Porcelain veneers offer a more comprehensive correction. These thin coverings bond to the front surface of your teeth, concealing persistent discoloration, cracks, and visible flaws that whitening simply can’t address.
Identifying which issue you’re actually treating matters. Attempting to whiten structurally compromised teeth wastes time and money.
Consult your dentist to determine whether cosmetic restoration is the more precise solution.
How Straighter Teeth Make Your Smile Look Whiter

Fixing chips, cracks, and discoloration addresses individual teeth, but alignment affects how your entire smile is perceived. Crooked or crowded teeth create uneven shadows that make your smile appear duller, even after whitening. Tooth straightening eliminates those visual disruptions, giving your smile a more uniform, brighter appearance.
Crooked teeth cast uneven shadows that dull your smile — straightening restores the brightness whitening alone can’t deliver.
Orthodontic aligners like Invisalign let you correct alignment discreetly without brackets or wires.
Straighter teeth also deliver functional advantages that support your whitening efforts:
- Easier cleaning between teeth reduces plaque buildup and staining
- Uniform surfaces reflect light more evenly, enhancing brightness
- Removable orthodontic aligners won’t interfere with whitening treatments
- Corrected spacing closes gaps that trap stain-causing food and bacteria
Combining tooth straightening with whitening gives you the most complete, controlled smile upgrade available.
The Right Order To Combine Whitening Methods for Maximum Impact
If you’re combining whitening methods, sequence matters. Start with professional in-office whitening to lift deep stains and establish a brighter baseline.
Then layer at-home products like trays, strips, or whitening toothpaste to extend and maintain those results.
This order maximizes your investment by letting the strongest treatment do the heavy lifting first.
Start With Professional Whitening
Professional whitening should be your starting point before layering in any other method. It delivers the deepest stain removal, establishing a clean baseline that maximizes every subsequent step. Skipping it first means you’re building on a compromised foundation.
- Manage teeth sensitivity by scheduling professional whitening before abrasive or acidic home methods that could aggravate exposed enamel.
- Extend whitening longevity by following up with maintenance strips or whitening toothpaste after your in-office treatment.
- Time your appointment strategically — professional whitening opens enamel pores temporarily, so avoid staining foods and drinks for 48 hours post-treatment.
- Confirm your candidacy first — restorations, crowns, or veneers don’t respond to bleaching agents, meaning professional assessment prevents wasted effort.
Starting with the strongest method gives you a controlled, measurable baseline to work from.
Layer At-Home Methods After
Once your in-office treatment establishes a clean baseline, at-home methods become maintenance tools rather than primary solutions. You’re not starting from scratch — you’re protecting an investment.
Layer strategically. Whitening toothpaste handles daily surface stains, while baking soda or diluted hydrogen peroxide rinses address gradual discoloration between professional visits. Natural remedies like oil pulling and activated charcoal can supplement your routine, but use them sparingly — enamel safety depends on frequency and technique, not just ingredient choice.
Apple cider vinegar carries erosion risk without a post-rinse protocol, so either skip it or rinse immediately with water.
Sequencing matters: clean first, whiten second, protect third.
When you treat at-home methods as a layered system rather than isolated fixes, you maintain results longer and reduce retreatment costs.
Frequently Asked Questions
Can Whitening Treatments Cause Long-Term Sensitivity or Damage to Tooth Enamel?
Whitening treatments can cause temporary gel sensitivity, but they won’t permanently damage enamel when you use them correctly. You’ll protect enamel safety by following product guidelines, limiting overuse, and consulting your dentist before starting any whitening regimen.
How Long Do Professional Whitening Results Typically Last Before Touch-Ups Are Needed?
Professional whitening results typically last six months to two years. You’ll extend longevity by integrating alternative whitening methods like touch-up trays and natural whitening remedies such as baking soda, while minimizing staining beverages and maintaining consistent daily oral hygiene habits.
Are Whitening Products Safe to Use During Pregnancy or While Breastfeeding?
Ironically, brighter teeth can wait—your baby can’t. Pregnancy safety concerns and breastfeeding considerations mean you should avoid whitening products during both phases. Consult your dentist before resuming any whitening treatment to guarantee you’re making the safest, most informed decision.
Does Teeth Whitening Work on Dental Crowns, Veneers, or Bonded Teeth?
Whitening treatments won’t lighten dental crown discoloration, veneers, or bonded teeth—they only work on natural enamel. For veneer stain removal or restoration brightening, you’ll need replacement or professional cosmetic consultation to match your desired shade.
At What Age Is It Safe to Start Using Whitening Products on Teeth?
You shouldn’t use whitening products until your permanent teeth have fully erupted—typically around age 16. Age considerations matter for safe timing, as younger enamel’s more vulnerable. Always consult your dentist before starting any whitening regimen.
References
- https://www.desertcreekdental.com/7-affordable-ways-to-improve-your-smile/
- https://www.hemetdds.com/blog/affordable-ways-to-improve-your-smile/
- https://smileangels.com/blog/7-surprising-ways-to-brighten-your-smile-naturally/
- https://www.webmd.com/oral-health/ss/slideshow-bright-smile
- https://www.carolinadentalarts.com/brighten-your-smile/
- https://www.mouthhealthy.org/ways-to-improve-smile
- https://www.healuno.com/article/how-to-keep-your-smile-bright-without-expensive-treatments