You’ll achieve the best teeth whitening results by following 10 essential steps. Start with a thorough dental assessment and professional cleaning, then document your baseline shade. Next, apply protective barriers and select professional-grade whitening gel. Monitor the treatment process carefully, followed by fluoride application and proper rinsing. Document your results and maintain strict aftercare. Following this systematic approach guarantees peak whitening while protecting your oral health – discover the detailed process to transform your smile.
Key Takeaways
- Schedule a professional dental assessment to evaluate oral health and determine suitability for whitening treatment.
- Get a thorough dental cleaning 1-2 weeks before whitening and maintain excellent oral hygiene through brushing and flossing.
- Document baseline tooth color using standardized shade guides and photos to track progress and set realistic goals.
- Apply protective barriers to gums before using professional-grade whitening gel with 25-40% hydrogen peroxide concentration.
- Follow post-treatment care by avoiding dark-colored foods for 48 hours and scheduling regular follow-ups every 6-12 months.
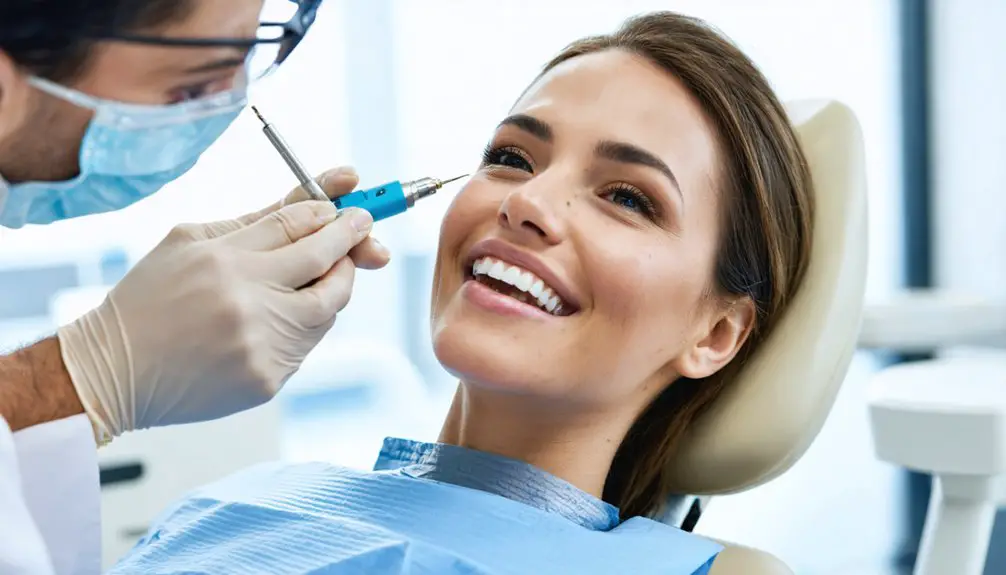
Initial Dental Assessment and Consultation
Before undergoing any teeth whitening procedure, you’ll need a thorough dental assessment to determine if you’re a suitable candidate. Your dentist will evaluate your oral health status, examine existing dental work, and identify any contraindications that might affect patient eligibility, such as large fillings or crowns that won’t respond to whitening.
A professional dental evaluation is essential before teeth whitening to assess candidacy and identify potential complications with existing dental work.
During this consultation, your dentist will assess the type and cause of your tooth discoloration, as yellow stains typically respond better than brown or gray ones. A professional dental cleaning must be completed to remove any buildup that could interfere with the whitening process. The dentist will conduct a thorough consultation to discuss your medical history and previous dental experiences.
They’ll use a standardized shade guide to document your current tooth color and take photos for comparison. You’ll discuss your whitening goals and expectations to create an appropriate treatment plan.
The dentist will also screen for any oral conditions that require treatment before proceeding with the whitening process.
Pre-Treatment Teeth Cleaning and Preparation
To guarantee ideal results from your teeth whitening procedure, proper preparation begins with a thorough professional dental cleaning 1-2 weeks before treatment. This cleaning removes plaque and tartar, ensuring even contact between the whitening gel and your tooth enamel.
Your pre-treatment diet should exclude staining substances like coffee, tea, red wine, and dark berries. Maintain excellent oral hygiene by brushing twice daily with sensitive toothpaste and flossing thoroughly. Good oral health must be established before any whitening can begin, so treat any existing cavities first.
You’ll need to discontinue any over-the-counter whitening products to prevent sensitivity and allow for accurate shade assessment. Regular water consumption throughout the day helps rinse away staining particles that could affect treatment results.
Before your appointment, eat a light meal and remove dental appliances or jewelry. Remember to communicate any existing tooth sensitivities to your dentist, as this information helps determine the most appropriate whitening product for your needs.
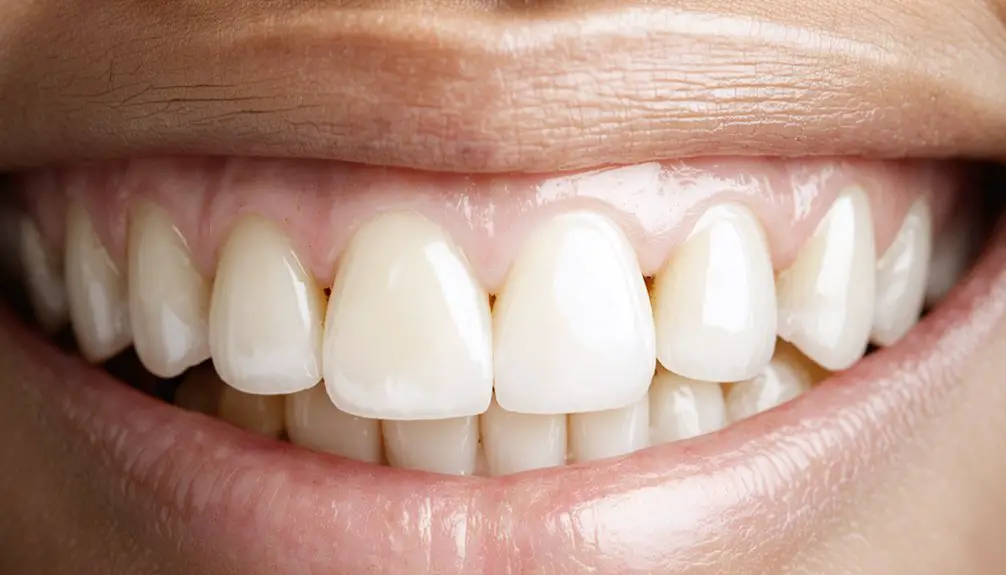
Baseline Shade Measurement
Accurate shade measurement establishes a critical baseline for your teeth whitening journey.
You’ll need to document your starting tooth color using standardized shade guide selection or advanced color measurement techniques. Your dentist may use either traditional shade guides with A1-D4 tabs or specialized bleaching guides for whiter shades.
For precise results, your dentist might employ spectrophotometers or colorimeters to measure different regions of your teeth, including the cervical, body, and incisal areas. Recent studies show significant improvements across all three regions after professional whitening treatments.
These instruments provide objective measurements using CIE color space parameters. They’ll take photographs and digital scans to track your progress effectively. Evaluation should be done with clean teeth against a neutral background for optimal accuracy.
The baseline measurements help determine realistic whitening goals and guarantee you’ll achieve natural-looking results that complement your facial features and skin tone.
Protective Barrier Application
Professional teeth whitening demands proper protection of your gums and soft tissues before applying any bleaching agents.
You’ll need to thoroughly clean and dry the treatment area, using retractors and cotton rolls to isolate the teeth and maintain a moisture-free field.
The process involves carefully applying barrier materials, typically resin-based or light-cured gels, along your gum line using precise application techniques.
Your dental professional will dispense the protective barrier using a syringe or brush, creating an even layer just above the gum margin.
They’ll then cure the barrier with a special light, forming a solid shield that prevents whitening agents from contacting your gums.
Before proceeding, they’ll verify the barrier’s integrity, checking for any gaps or incomplete curing to guarantee your complete protection throughout the treatment.
The hydrogen peroxide in whitening gels can cause significant irritation if it comes into contact with unprotected gum tissue.
Regular staff training and education ensures proper application techniques that minimize the risk of gum irritation during the whitening process.
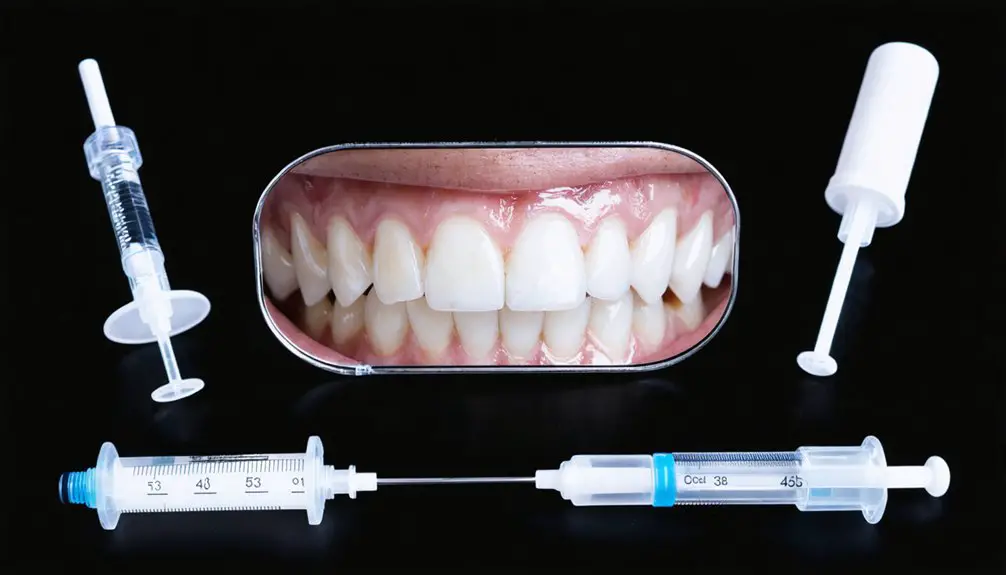
Professional Whitening Gel Selection
Your dentist will select a professional whitening gel with peroxide concentrations ranging from 25% to 40% hydrogen peroxide, which is considerably stronger than over-the-counter products.
Leading dental manufacturers offer specialized whitening agents featuring advanced formulations with desensitizing ingredients and precise delivery systems for controlled application. Opalescence PF gels offer concentrations from 10% to 45% with added potassium nitrate and fluoride for effective whitening.
You’ll benefit from carefully chosen concentrations based on your specific needs, ensuring both safety and ideal results through professional supervision during the procedure. The application process typically takes 30-60 minutes for in-office treatments to achieve optimal whitening results.
Understanding Peroxide Concentrations
The selection of dental whitening gels hinges primarily on their peroxide concentration levels, with options ranging from 6% to 44% hydrogen peroxide content.
You’ll find that professional-grade gels offer higher concentrations for rapid results, while over-the-counter products maintain safer, lower levels around 10% as recommended by the ADA.
When considering whitening efficacy, remember that carbamide peroxide concentrations convert to one-third the strength of hydrogen peroxide. For example, a 22% carbamide peroxide solution equals roughly 7.3% hydrogen peroxide.
While higher concentrations accelerate whitening, they also increase sensitivity risks. That’s why peroxide safety protocols require professional supervision for concentrations above 10%.
You’ll achieve ideal results by matching the appropriate concentration to your specific treatment method and time requirements.
Popular Whitening Agent Brands
Leading whitening agents in professional dentistry include three prominent brands: Opalescence™, Oralgen NuPearl, and White in Minutes™.
Opalescence advantages include customizable strengths from 10% to 45% carbamide peroxide, superior shade stability, and multiple flavor options.
You’ll find Oralgen effectiveness demonstrated through its gentle formula, achieving 2.1 shade improvements within a week using LED activation and 40-minute treatments.
White in Minutes stands out with its FDA-certified manufacturing and dual peroxide formulations.
Dentist preferences often favor these brands for their proven clinical results and patient comfort. Each brand meets strict professional criteria, offering minimal sensitivity and reliable outcomes.
You’ll appreciate their compatibility with various delivery systems, whether you’re using trays, lights, or brush-on applications.
Safety Features Required
Professional whitening gel selection demands five critical safety features to guarantee ideal patient protection.
You’ll need to verify that products comply with safety regulations regarding hydrogen peroxide concentration, which shouldn’t exceed 0.1% for home use.
Ascertain ingredient transparency by checking that all components and their concentrations are clearly listed on the label.
Choose products that include detailed usage instructions and safety information on their labels.
It’s crucial to confirm that manufacturers have registered their products with relevant authorities like the FDA.
Finally, make certain the whitening treatment will be administered under professional supervision.
This oversight helps prevent misuse, monitors potential sensitivity, and assures the treatment’s effectiveness while maintaining peak safety standards for your patients.
Light Activation Process
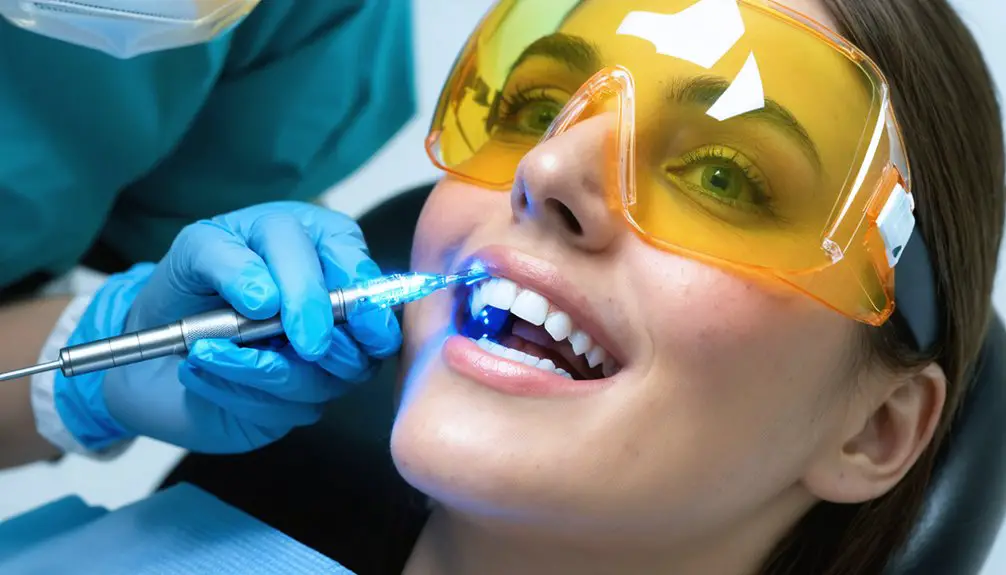
During modern teeth whitening procedures, light activation serves as an important catalyst that accelerates the bleaching process through specialized LED or UV equipment.
The specific wavelength effects of blue or indigo light interact with hydrogen peroxide or carbamide peroxide gels to enhance gel penetration depth into the enamel’s pores, targeting deep-set stains effectively.
You’ll need to position the light guide near the patient’s teeth, ensuring stable alignment with dental retractors. Treatment sessions typically last 10-30 minutes, and the device’s built-in controls help you monitor progress.
It’s vital to maintain communication with your patient throughout the activation period. This light-activated approach achieves results up to 8-10 times faster than gel-only treatments, though you may need multiple sessions spaced weeks apart for best whitening results.
Treatment Monitoring and Adjustments
While light activation accelerates the whitening process, careful monitoring guarantees ideal results and patient safety throughout treatment.
You’ll need to systematically record shade measurements and compare them to baseline readings during each treatment evaluation. Use objective color scales or digital instruments to verify accurate tracking of progress.
Monitor your patient’s sensitivity levels closely, as peroxide agents can cause temporary discomfort. If needed, adjust exposure time or concentration based on patient feedback.
Apply desensitizing agents between sessions to manage sensitivity. Watch for adverse effects like gum irritation or enamel changes, taking immediate action if issues arise.
Schedule regular follow-ups every 6-12 months to maintain results and assess the need for touch-up treatments. Customize maintenance protocols based on individual lifestyle factors and oral hygiene habits.
Final Rinse and Fluoride Treatment

You’ll need a thorough water rinse to completely remove all whitening gel residue from your teeth and gums, using a combination of water flow and air spray for ideal cleaning.
After rinsing, your dental professional will apply a protective fluoride treatment to help remineralize your enamel and reduce potential sensitivity from the bleaching process.
The fluoride application strengthens your tooth structure while maintaining your newly achieved whitening results, serving as an essential final step in your treatment.
Thorough Gel Removal Process
Three essential steps make up the detailed gel removal process after teeth whitening treatment.
First, you’ll need to use surgical suction tips to remove bulk gel from the teeth surface right after the whitening cycles. During gel removal techniques, it’s vital to avoid direct contact between gel removal instruments and tooth surfaces to prevent damage.
Next, you’ll want to flush the teeth using a gentle air and water spray combination to eliminate any residual whitening gel. For stubborn areas near the gingiva or tooth barriers, carefully slide an explorer or forceps to remove trapped gel.
Finally, perform a thorough water rinse to wash away remaining gel particles. This extensive approach guarantees complete gel removal while protecting your patient’s enamel and surrounding tissues.
Protecting Against Tooth Sensitivity
Since tooth sensitivity commonly occurs after whitening procedures, implementing proper final rinse and fluoride treatment protocols is essential for patient comfort.
Your sensitivity management approach should include gentle rinsing techniques with lukewarm water to avoid thermal shock, followed by professional fluoride application to strengthen enamel and block exposed dentinal tubules.
- Use a soft-bristled toothbrush and desensitizing toothpaste containing potassium nitrate for gentle yet effective cleaning.
- Avoid acidic, hot, or cold foods and beverages immediately after treatment to protect your newly whitened teeth.
- Drink through a straw when consuming beverages to minimize contact with sensitive teeth.
- Schedule regular fluoride treatments to maintain long-term enamel protection and prevent sensitivity recurrence.
For ideal results, you’ll need to maintain these protective measures consistently, especially during the first 24-48 hours post-whitening.
Strengthening Post-Treatment Enamel
Following whitening treatments, proper enamel strengthening protocols are crucial for maintaining both tooth health and treatment longevity.
You’ll need to focus on two key aspects: fluoride benefits and enamel hydration.
Start with a lukewarm water rinse immediately after treatment to rehydrate your teeth.
Then apply a professional fluoride treatment or use an alcohol-free fluoride mouthwash to rebuild and strengthen your enamel. This creates a protective barrier that reduces sensitivity and enhances resistance to acid attacks.
Continue strengthening your enamel by brushing twice daily with fluoride-enriched toothpaste and drinking plenty of water.
You’ll also want to consume calcium-rich foods while avoiding acidic substances for 48 hours post-treatment.
These steps guarantee ideal enamel recovery and help maintain your whitening results.
Post-Treatment Care Instructions
After completing a teeth whitening procedure, proper aftercare becomes essential to maximize and maintain your results.
Follow strict dietary recommendations by avoiding dark-colored foods and drinks for 48 hours, and stick to a “white diet” including chicken, fish, and rice.
Managing sensitivity is vital during the first 72 hours, so use desensitizing toothpaste and take OTC pain relievers if needed.
- Keep staining substances away from your teeth by using straws when drinking colored beverages.
- Maintain thorough oral hygiene with gentle brushing and daily flossing.
- Wait 48 hours before using mouthwash containing alcohol or chlorhexidine.
- Consume foods at room temperature to minimize sensitivity discomfort.
Remember to schedule regular dental check-ups every six months to preserve your whitening results and maintain peak oral health.
Results Documentation and Maintenance Plan
You’ll want to thoroughly document your teeth whitening results through professional before-and-after photos taken under standardized lighting conditions.
Your dentist will track the success of your treatment using shade guides and digital color measurement tools to quantify improvements in tooth color.
Regular documentation helps monitor long-term whitening stability and guides any necessary adjustments to your maintenance plan.
Before-After Photo Documentation
Professional documentation of teeth whitening results requires standardized before-and-after photos to track treatment success and maintain long-term outcomes.
You’ll need to maintain consistent lighting, camera settings, and positioning to guarantee ideal photo quality. Digital image organization with proper time stamps and patient IDs will help you track progress effectively.
- Use specialized dental photography tools like Smile Lite MDP or polarization filters to capture true tooth color without glare
- Document with dental shade guides in each photo for objective color comparison
- Schedule follow-up photos at 1, 3, and 6 months to monitor whitening stability
- Include detailed close-ups of surface changes using macro lenses or intraoral cameras
This systematic approach helps you demonstrate treatment effectiveness to patients while maintaining precise clinical records for future reference.
Treatment Success Tracking
Successful teeth whitening treatments demand systematic tracking and documentation beyond photographic records.
You’ll need to conduct thorough treatment evaluation using standardized shade guides at multiple intervals, including baseline, mid-treatment, and post-procedure assessments. Track ΔE values and shade improvements of 1-3 tabs as benchmarks for outcome analysis.
Document sensitivity levels and correlate them with peroxide concentrations to optimize future treatments.
Create detailed maintenance protocols, including custom-fitted touch-up trays and specific usage patterns. You should prescribe 1-hour daily applications for 7-10 days initially, followed by 1-2 days every 6-12 months.
Monitor long-term stability through periodic reassessments every 2-3 years, adjusting maintenance regimens based on individual staining tendencies and clinical response patterns.
Frequently Asked Questions
How Long Does Professional Teeth Whitening Last Before Needing Another Treatment?
While you’re dreaming of forever-white teeth, your professional whitening’s longevity typically lasts 6 months to 3 years. You’ll need whitening maintenance sooner if you can’t resist those coffee breaks.
Can I Eat or Drink Normally During the Days Following Treatment?
You’ll need to follow strict dietary restrictions for 48 hours post-treatment, consuming only white or pale foods while avoiding dark, acidic, and staining substances to protect your whitening results.
Does Insurance Typically Cover Professional Teeth Whitening Procedures?
Most dental insurance plans won’t cover teeth whitening since it’s considered cosmetic. You’ll typically need to pay out-of-pocket, though some plans offer limited coverage or discounts for whitening options.
What’s the Average Cost Difference Between In-Office and Take-Home Whitening Treatments?
You’ll find a significant cost comparison between treatment options: in-office whitening typically costs $300-$1,000 per session, while take-home treatments range from $50-$600 for the complete kit.
Are There Any Natural Alternatives to Professional Teeth Whitening Treatments?
Bright as a diamond’s shine, you can try gentle alternatives like charcoal whitening or baking soda paste. Oil pulling, crunchy fruits, and avoiding stain-causing foods will help maintain whiter teeth naturally.
References
- https://www.medparkhospital.com/en-US/disease-and-treatment/teeth-whitening-treatment
- https://www.suttonpda.com/in-office-teeth-whitening/
- https://alamoanadentalcare.com/your-step-by-step-guide-to-teeth-whitening-at-the-dentist/
- https://coulonwatts.com/2020/07/08/how-does-teeth-whitening-work-at-a-dentist-office/
- https://www.youtube.com/watch?v=IE1P9O3myWw
- https://www.drkimmartin.com/the-ultimate-guide-to-zoom-teeth-whitening-procedure/
- https://thedentalspa.com/teeth-whitening-step-by-step-guide/
- https://dentalwellnessanna.com/preparing-for-your-first-teeth-whitening-appointment/
- https://www.cedarbrookdental.com/articles/what-to-do-before-teeth-whitening-treatment
- https://cupertinofamilydental.com/how-to-prepare-for-professional-teeth-whitening/