To safely whiten your teeth at home, stick to products containing 3-6% hydrogen peroxide and follow all application instructions carefully. Never exceed recommended treatment times or frequency, and stop immediately if you experience persistent sensitivity or gum irritation. Monitor for warning signs like uneven coloring, white spots, or gum recession. While DIY methods can be effective, understanding proper techniques and safety measures will help you achieve the best results without compromising your oral health.
Key Takeaways
- Use only products containing 3-6% hydrogen peroxide concentration to minimize tissue damage while maintaining whitening effectiveness.
- Follow recommended application times strictly, limiting rinses to 1 minute and brushing to 2 minutes per session.
- Stop treatment immediately if experiencing persistent tooth sensitivity, uneven whitening, or gum irritation.
- Avoid natural remedies like lemon juice, which can permanently erode tooth enamel through high acidity.
- Space out treatments to allow recovery time and monitor gums regularly for signs of chemical burns or recession.
Understanding Common Teeth Whitening Dangers
While DIY teeth whitening products promise an affordable path to a brighter smile, they carry significant risks that can permanently damage your oral health. The most serious concern is enamel erosion caused by harsh chemicals and abrasives in these products. Once your enamel wears away, it won’t regenerate, leaving your teeth vulnerable to sensitivity and decay. Natural remedies like lemon juice can be particularly destructive due to their high acidity levels.
Another major risk is gum irritation, which manifests as redness, swelling, and bleeding. Prolonged exposure to whitening agents can lead to permanent gum recession and increase your risk of infection. Common over-the-counter whitening products can cause white spots on gums with extended use.
You might also experience uneven results, especially if you have dental restorations, and severe tooth sensitivity that requires professional treatment. Before attempting any DIY whitening, consider that unregulated products may contain harmful chemicals that could cause irreversible damage to your oral tissues.
The Truth About Peroxide Concentrations
Understanding the correct concentration of hydrogen peroxide is essential for safe DIY teeth whitening. For ideal peroxide safety, you’ll want to stick to products containing 3% to 6% hydrogen peroxide when whitening at home.
Never exceed 9% concentration, as this greatly increases your risk of tissue damage and sensitivity. The chemical oxidation process breaks down stains gradually while protecting your enamel integrity.
When applying peroxide-based whiteners, timing matters as much as concentration. Keep contact time under 1 minute for rinses and 2 minutes for brushing applications.
Don’t use these treatments more than once daily, as this can lead to enamel erosion. Proven effectiveness studies support using low concentrations for safe results. Concentration effects become more dangerous with extended exposure, so always follow product instructions precisely.
For your safety, choose products with the ADA Seal of Acceptance, and consult your dentist before starting any whitening regimen.
Smart Practices for Safe Home Whitening
You’ll achieve safer whitening results by starting with lower-concentration products and gradually working up to stronger ones as your teeth adjust.
When whitening at home, space out your treatments to allow recovery time between sessions and monitor closely for any tooth sensitivity or gum irritation. The most effective at-home treatments contain peroxide-based gels that break down staining molecules.
If you experience persistent discomfort or notice your teeth becoming translucent, it’s time to stop and consult your dentist. Consider using diluted hydrogen peroxide in homemade whitening pastes no more than a few times per week to avoid damaging your teeth.
Start Low, Go Slow
Three fundamental principles guide safe at-home teeth whitening: starting with low concentrations, limiting application frequency, and monitoring sensitivity.
When you’re beginning your whitening journey, start low with peroxide concentrations under 16%. Choose products containing 10% carbamide peroxide, which delivers gradual results while protecting your enamel. These lower concentrations achieve comparable long-term outcomes more safely than higher-strength alternatives. Recent studies show that using lower concentrations results in reduced sensitivity risk compared to higher peroxide formulations. It’s essential to consult with a dental professional before starting any whitening treatment.
For ideal sensitivity management, follow the product’s application timing precisely, typically 30-60 minutes per session. Your whitening expectations should align with a gradual approach – results may take 1-2 weeks to appear.
During product selection, look for clinically validated over-the-counter kits with fluoride content, which helps maintain enamel strength. Safety first means avoiding unproven natural remedies or high-acid solutions that risk damaging your teeth.
Know When to Stop
While achieving a brighter smile is desirable, recognizing when to halt whitening treatments is essential for protecting your oral health.
Watch for persistent tooth sensitivity beyond mild discomfort, as this indicates potential enamel damage. Consider using fluoride treatments before starting any whitening regimen. If you notice uneven whitening, gum irritation, or a chalky appearance on your teeth, stop treatment immediately. Applying the hydrogen peroxide formula carefully helps minimize risks while still achieving results.
Follow recommended whitening duration guidelines carefully – most home treatments shouldn’t exceed two weeks of consecutive use. Limit individual sessions to 30-60 minutes as specified on product instructions.
When you experience any concerning symptoms, consult your dentist promptly for professional assessment. They can evaluate whether you should pause or permanently discontinue whitening, and may suggest alternative approaches if sensitivity persists.
Warning Signs to Watch For
Identifying warning signs early is essential when performing DIY teeth whitening treatments to prevent lasting damage to your oral health.
Watch for signs of enamel erosion and gum irritation, as these indicate you should stop treatment immediately and consult a dental professional.
Key warning signs you shouldn’t ignore:
- Increased tooth sensitivity to hot, cold, or sweet foods that persists beyond a week
- Redness, swelling, or bleeding of gums after whitening applications
- Uneven coloration, white spots, or visible patches on tooth surfaces
If you notice rough or translucent edges on your teeth, or experience persistent gum tenderness, discontinue whitening immediately.
Chemical burns from harsh products can cause lasting damage to both enamel and soft tissue, potentially requiring professional intervention to address.
Essential Safety Measures and Precautions
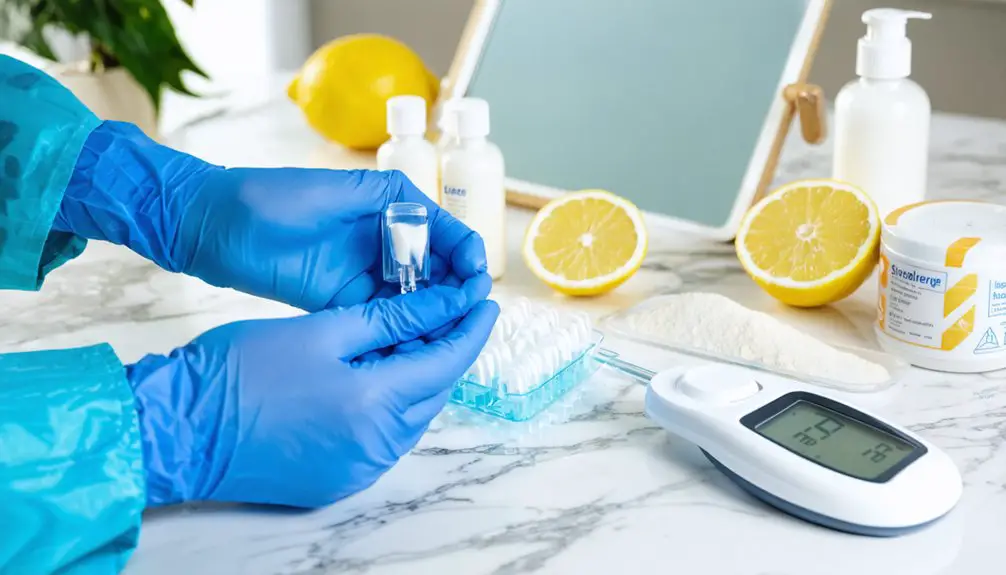
When selecting DIY teeth whitening products, you’ll want to choose options with lower peroxide concentrations to minimize risks while still achieving results.
You must carefully read and follow all product instructions regarding application time, frequency, and proper usage methods to prevent damage to your teeth and gums.
It’s critical to examine your gums daily during whitening treatments, watching for any signs of irritation, swelling, or changes in color that could indicate adverse reactions.
Choose Lower Peroxide Concentrations
Although professional dental treatments may use hydrogen peroxide concentrations up to 40%, you’ll want to stick with much lower concentrations of 3-6% for safe at-home teeth whitening.
These lower concentration benefits include effective stain removal while minimizing risks of sensitivity and enamel damage.
When selecting safe whitening options, consider these essential factors:
- Choose products containing 3-6% hydrogen peroxide that are ADA-approved.
- Never exceed recommended application times, as exposure duration greatly impacts safety.
- Avoid DIY mixing of solutions, as imprecise concentrations can lead to complications.
Follow Product Instructions Carefully
Safe home teeth whitening depends heavily on proper product usage and instruction compliance. You’ll need to carefully read and follow all guidelines to guarantee product safety and ideal results.
Before applying any whitening product, conduct a patch test to check for potential sensitivity or allergic reactions.
When using whitening products, strictly adhere to recommended application techniques, timing, and frequency. Don’t exceed specified treatment durations, as overuse can damage your enamel and cause gum irritation.
Use only the tools and applicators provided with your kit, and avoid combining multiple whitening products simultaneously. If you experience severe discomfort or persistent sensitivity, discontinue use immediately and consult your dentist.
Remember that proper application not only protects your oral health but also helps achieve more uniform, lasting results.
Monitor Gum Health Daily
Regular monitoring of your gum health serves as a critical safeguard during any teeth whitening regimen. Watch for early irritation signs like redness, swelling, or sensitivity around your gum line. If you notice persistent discomfort or unusual changes in gum texture, discontinue whitening immediately and consult your dentist.
Key daily checks you must perform:
- Examine your gums for any redness, swelling, or recession while brushing.
- Note any bleeding or gum sensitivity during flossing.
- Check for chemical burns, which appear as white patches or sores on gum tissue.
Don’t ignore symptoms of gum irritation, as continued exposure to whitening agents can lead to long-term damage.
Remember to keep whitening products strictly on your teeth’s surface, avoiding contact with gum tissue whenever possible.
Professional Vs DIY Whitening Methods
When choosing between professional and DIY teeth whitening methods, you’ll find significant differences in their effectiveness, safety, and cost.
Professional whitening uses high concentrations of peroxide (25-40%), delivering up to 8 shades lighter in one session, while DIY kits contain lower concentrations (3-10%), achieving 3-6 shades over weeks or months.
Dental professionals customize treatments to your specific needs, ensuring uniform results and preventing damage to restorations.
They’ll monitor your progress and adjust treatment to minimize sensitivity and gum irritation.
While DIY kits offer convenience and affordability ($10-$50 versus $300-$1,000 for professional treatment), they carry risks of uneven application and potential enamel damage if misused.
Consider professional whitening for stubborn stains or if you have dental work, as it provides longer-lasting results and supervised care.
How to Choose the Right OTC Products
Selecting the right over-the-counter teeth whitening product requires understanding key factors like peroxide concentration, application method, and your specific needs.
Consider product efficacy and user comfort when evaluating options, as these directly impact your whitening success.
- Check peroxide concentrations – strips and trays with 3-10% hydrogen peroxide offer balanced results while minimizing sensitivity risks.
- Match the application method to your lifestyle – strips and trays provide better results than pens, though they require more time commitment.
- Assess your stain type – surface stains respond well to OTC products, while deeper discoloration may need professional treatment.
If you’ve experienced tooth sensitivity before, choose products with lower peroxide concentrations or those containing desensitizing agents.
Remember that maintaining proper contact time between the whitening agent and your teeth greatly affects results.
Best Practices for Long-Term Enamel Health
Maintaining long-term enamel health requires a strategic approach to teeth whitening that balances cosmetic goals with protective measures.
Successful teeth whitening requires careful balance between achieving desired brightness and protecting the essential enamel layer of your teeth.
You’ll need to focus on enamel remineralization techniques, including regular use of fluoride products and maintaining proper hydration to support natural repair processes.
To prevent lasting damage, stick to professional-recommended concentrations of whitening agents and avoid frequent treatments.
Long-term sensitivity management starts with using custom-fitted trays and following prescribed treatment durations.
You can protect your patients’ enamel by recommending desensitizing agents and emphasizing proper oral hygiene practices.
Monitor for signs of enamel stress and adjust whitening protocols accordingly.
Encourage patients to minimize acidic foods and beverages while maintaining consistent professional dental care to guarantee their brightened smile remains healthy for years to come.
Frequently Asked Questions
Can Teeth Whitening Affect Existing Dental Work Like Crowns or Veneers?
Like a vinyl sticker won’t fade in sunlight, your crowns discoloration isn’t affected by whitening treatments. The veneers durability makes them resistant to bleaching, so they’ll maintain their original shade while natural teeth whiten.
How Long Should I Wait Between Whitening Treatments for Optimal Results?
You’ll want to wait 6 months between professional treatments or 3-6 months for at-home kits. During initial whitening frequency, space treatments 48-72 hours apart for best results and minimal sensitivity.
Does Drinking Through a Straw Prevent Staining During Whitening Treatment?
Like a shield for your smile, drinking through a straw during whitening treatment can help reduce staining, but it’s not foolproof. You’ll still need proper whitening techniques and straw placement for best benefits.
Are Natural Whitening Alternatives Like Charcoal or Baking Soda Equally Effective?
You’ll find baking soda offers safer, mild stain removal compared to charcoal’s limited effectiveness. Neither matches professional whitening treatments, but baking soda poses less risk of damaging your tooth enamel.
Can Teeth Become Permanently Sensitive From Repeated Whitening Treatments?
While temporary sensitivity is common, you won’t likely experience permanent damage if you control whitening frequency carefully. However, aggressive overuse can increase long-term sensitivity levels through enamel deterioration.
References
- https://pmc.ncbi.nlm.nih.gov/articles/PMC4058574/
- https://www.frontiersin.org/journals/dental-medicine/articles/10.3389/fdmed.2021.687507/full
- https://www.loudfamilydentistry.com/blog/teeth-whitening-related-statistics-on-effectiveness-and-sensitivity-incidence
- https://www.advancedindiana.com/dental-health/warnings-about-over-the-counter-teeth-whitening
- https://www.bu.edu/articles/2012/the-truth-about-teeth-whiteners/
- https://www.richardfossumdds.com/blog/what-are-the-dangers-of-diy-teeth-whitening/
- https://www.mydental.com/the-dangers-of-diy-teeth-whitening-critical-information-to-know/
- https://www.glendaleheightsfamilydental.com/blogs/diy-teeth-whitening-risks
- https://www.smileklubdental.com/teeth-whitening-gone-wrong-heres-what-you-should-know-before-you-try-it-at-home/
- https://health.clevelandclinic.org/is-teeth-whitening-safe
