You’ll achieve ideal results with LED teeth whitening kits by selecting products with 6-12% hydrogen peroxide, applying gel evenly across visible surfaces, and using flexible mouthpieces that conform to your dental anatomy. Limit sessions to manufacturer-recommended durations of 10-30 minutes, maintain 24-48 hour intervals between treatments, and avoid staining foods for two weeks post-treatment. Professional-grade at-home kits typically deliver 4-6 shade improvements over 7-14 days when you follow evidence-based protocols that balance efficacy with enamel protection and sensitivity management throughout your whitening journey.
Key Takeaways
- Choose hydrogen peroxide at 6-15% concentration or 12% PAP for safe, effective whitening with LED activation.
- Apply thin, even gel layers across visible front teeth, avoiding excess gum contact to prevent irritation.
- Follow manufacturer-recommended session times of 5-30 minutes to protect enamel and minimize sensitivity risks.
- Use flexible LED mouthpieces that conform to teeth, ensuring uniform light penetration and consistent shade improvement.
- Expect 4-6 shade improvement over 7-14 days, with results lasting 12-24 months through proper maintenance.
Verify Active Ingredients Before Purchase
LED teeth whitening kits contain various active ingredients that determine both their safety profile and whitening efficacy. You’ll want to prioritize hydrogen peroxide at 6% concentration, which delivers the highest whitening results with a ΔE of 9.6.
PAP at 12% serves as a safer alternative, achieving a ΔE of 6.6 without peroxide-related sensitivity. Avoid products containing chlorine dioxide, which strips enamel and increases cavity risk, or titanium dioxide nanoparticles linked to potential DNA damage. Check ingredient compatibility with your oral health status before purchasing.
Seek dental professional advice if you have existing sensitivity or gum concerns. Look for the ADA Seal of Acceptance and transparent ingredient lists that exclude harsh additives. Confirm peroxide levels remain moderate to protect enamel integrity.
Choose the Right Peroxide Concentration for Your Needs
Once you’ve confirmed the active ingredients meet safety standards, you’ll need to select an appropriate peroxide concentration that aligns with your whitening goals and treatment setting. For at-home LED kits, concentration range selection between 9–15% hydrogen peroxide delivers significant shade improvement—often exceeding three levels in 14 days—while minimizing sensitivity. These lower concentrations paired with blue or violet LED activation match the efficacy of 35% hydrogen peroxide systems over one month.
If you’re seeking professional treatment suitability, 35–37.5% hydrogen peroxide formulations typically require controlled 20-minute sessions with halogen or laser activation. These higher concentrations produce greater initial lightness (Delta L* 4.7 units) and maintain results for three weeks when properly activated. Your choice should balance desired speed, sensitivity tolerance, and supervision level available during treatment.
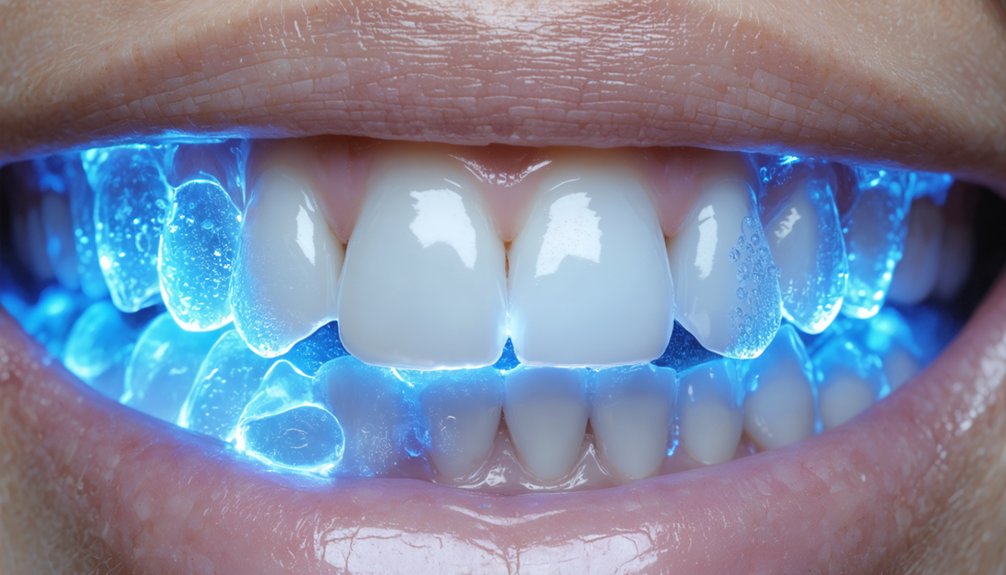
Apply Gel Evenly to Avoid Patchy Results
Achieving uniform whitening results depends on your ability to distribute gel consistently across all visible tooth surfaces. You’ll need to master proper applicator pen technique, fill trays to the correct level without overflow, and verify complete coverage before LED activation.
Uneven application creates patchy discoloration patterns that compromise treatment outcomes and require additional sessions to correct.
Use Applicator Pens Correctly
Proper applicator pen technique determines whether your whitening results appear uniform or blotchy across your smile. Twist the pen’s base 2-3 quarter-turns until gel appears on the brush tip—first-time use requires up to 7 twists.
Apply a thin, even layer using short strokes across 6-8 visible teeth per arch, painting from gum line to biting edge. Target natural tooth surfaces only, avoiding restorations like fillings or crowns. If gel contacts gums, remove immediately with tissue.
Clean bristles with dry tissue after each application and recap for proper storage. Maintain daily inspection of the pen mechanism to guarantee consistent gel dispensing. Allow 30 seconds for gel adhesion before closing your mouth, then avoid food and beverages for 30 minutes to maximize treatment effectiveness.
Fill Trays Without Overflow
Tray whitening success depends on applying the correct gel amount—approximately 0.5ml per arch, equivalent to one-quarter teaspoon or a grain of rice per tooth indentation. Proper tray loading prevents gum irritation and maximizes treatment efficacy. Position small drops halfway up the inner front surface of each tooth compartment, prioritizing the front six to eight visible teeth.
Syringe technique optimization requires controlled pressure to avoid dispensing excess gel. You can employ either the continuous bead method—laying gel in a U-shape from back to front—or individual drops per tooth. If overflow occurs, pull back on the syringe plunger to retrieve excess gel before tray insertion.
Press trays firmly against teeth to distribute gel evenly across enamel surfaces. Should gel contact gums, wipe immediately with tissue to prevent temporary burning sensations.
Check Coverage Before Activation
Once you’ve loaded your trays correctly, inspect the gel distribution across all targeted teeth before activating the LED light. This verification step guarantees full teeth coverage and prevents patchy whitening outcomes. The LED accelerates peroxide breakdown only where gel contacts enamel evenly, making thorough inspection vital.
Pre-activation checklist:
- Confirm thin, even layer covers all visible tooth surfaces without gaps
- Remove excess gel from gums immediately to prevent irritation
- Verify moisture-free surfaces to maintain proper gel adhesion
- Position LED device to illuminate all gel-covered areas uniformly
- Identify ideal activation duration per manufacturer guidelines (typically 10-30 minutes)
Uneven application creates inconsistent results because plaque, debris, or moisture blocks gel effectiveness. Professional-grade outcomes require meticulous coverage verification before each treatment session.
Follow the Recommended Treatment Duration

Adhering to manufacturer-specified treatment durations represents the critical difference between achieving ideal whitening results and risking dental complications. Individual sessions typically range from 5-30 minutes depending on your kit’s strength, with MOON requiring just 5 minutes while Auraglow prescribes 30-minute daily applications.
Complete treatment courses span 7-14 days for preferred shade improvement—Rivers Edge Dental recommends 16-minute sessions for 10 days maximum, while MOON permits twice-daily use over 14 days. You’ll maintain consistent lighting effectiveness by following prescribed intervals of 24-48 hours between treatments.
Exceeding recommended durations causes unnecessary sensitivity and enamel stress without accelerating results. Just as you’d avoid oversanitizing to prevent tissue damage, respect time limits to protect your dental health while achieving your desired whitening outcome through controlled, evidence-based application protocols.
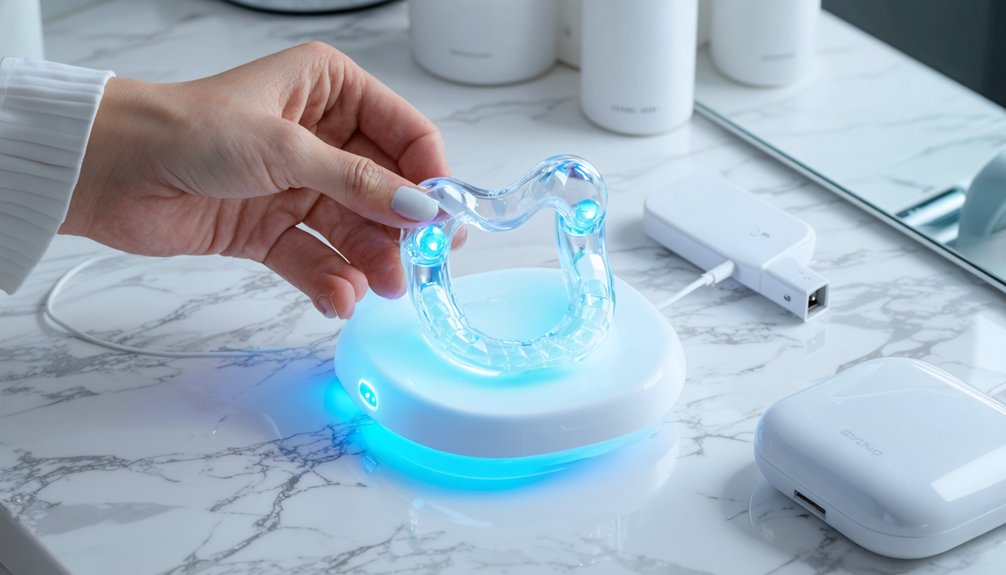
Use Flexible LED Mouthpieces for Complete Coverage
Flexible LED mouthpieces greatly improve whitening outcomes by conforming to your unique tooth contours, ensuring uniform gel distribution across all visible surfaces. The adaptable silicone material eliminates air pockets and prevents gel pooling that commonly occurs with rigid trays, allowing consistent light penetration for excellent peroxide activation.
Clinical studies demonstrate that this complete coverage approach delivers even color change across treated surfaces, with patients achieving up to 4.8 shade guide units of improvement while maintaining comfort throughout 30-60 minute treatment sessions.
Even Gel Distribution Benefits
When LED mouthpieces conform to your unique dental anatomy, they guarantee whitening gel maintains consistent contact across all tooth surfaces rather than pooling in isolated areas.
This uniform coverage delivers measurable advantages:
- Balanced shade improvement: You’ll achieve 6-8 shade lightening consistently across your entire smile, eliminating patchy results from inadequate gel distribution
- Accelerated peroxide breakdown: Consistent activation through even LED exposure doubles the chemical reaction speed, penetrating enamel uniformly
- Enhanced stain removal: Complete gel contact maximizes peroxide effectiveness on stubborn discoloration while maintaining 24-hour efficacy post-treatment
- Minimized sensitivity: Uniform distribution prevents overexposure on specific teeth, reducing irritation while allowing lower peroxide concentrations
- Optimized treatment efficiency: Flexible trays eliminate gaps between mouthpiece and teeth, ensuring every surface receives adequate gel penetration depth
Comfort During Treatment Sessions
During extended whitening sessions, rigid mouthpieces create pressure points that force users to maintain uncomfortable jaw positions, whereas flexible LED devices conform to your dental contours and eliminate strain throughout 10-30 minute treatments. You’ll maintain control over your protocol while experiencing hands free use that enables movement and multitasking.
The moldable design distributes gel evenly across all tooth surfaces while preventing slippage that compromises activation. Clinical evidence demonstrates wireless systems incorporating cool blue LED technology generate no heat, minimizing sensitivity below mild thresholds. Users report successful sleep during use with properly fitted devices, allowing overnight protocols without jaw fatigue.
The ComfortFit architecture adapts to your unique dental anatomy, eliminating gag reflexes common with oversized trays while ensuring consistent light exposure and gel contact across anterior and posterior surfaces.
Complete the Full Course for Optimal Results

Achieving maximum whitening results requires completing the entire 7-14 day treatment protocol as specified by your kit’s manufacturer. Skipping sessions or stopping prematurely will compromise your shade improvement potential, limiting you to suboptimal outcomes rather than the full 6-shade enhancement possible.
To maximize improvements through a consistent treatment schedule:
- Perform daily 10-30 minute sessions without interruption throughout the complete course
- Use the LED light for the manufacturer-specified duration to activate bleaching agents evenly
- Brush and dry teeth before each application to enhance gel adherence
- Maintain the routine even after initial visible changes appear
- Track your progress to stay motivated through the full treatment period
Consistency determines your final whitening success, transforming gradual stain removal into exhaustive shade transformation when you follow through completely.
Manage Tooth Sensitivity With Specialized Formulas
You can markedly reduce tooth sensitivity during LED whitening treatments by selecting kits formulated with desensitizing agents like potassium nitrate or fluoride, which block pain signals and strengthen enamel.
Adjust your treatment frequency by extending intervals between sessions if sensitivity develops, allowing your teeth adequate recovery time rather than adhering to aggressive daily schedules. Monitor your sensitivity levels between each session and modify your approach accordingly—reducing application time, lowering peroxide concentration, or temporarily pausing treatment until discomfort subsides.
Choose Desensitizing Ingredient Kits
When tooth sensitivity threatens to derail your whitening progress, specialized desensitizing formulas become essential treatment tools. You’ll gain maximum control by selecting kits with proven active ingredients that deliver customizable sensitivity solutions through flexible application techniques.
Look for these evidence-based desensitizing components:
- Potassium nitrate at 3% concentration to calm nerve endings and provide rapid relief from whitening-induced sensitivity
- Fluoride ions (0.11% minimum) for sustained enamel protection and enhanced remineralization after bleaching treatments
- Dual-action formulas combining both potassium nitrate and fluoride for ideal nerve calming and pore blocking
- Pre-treatment application protocols using trays for 10-30 minutes before whitening sessions
- Enamel-safe compositions excluding harsh irritants like high-concentration hydrogen peroxide and sodium chlorite
You’ll achieve excellent results by brushing first to remove biofilm before applying desensitizing gel.
Adjust Treatment Frequency Gradually
Gradual treatment progression prevents the acute sensitivity that derails 60% of first-time whitening attempts. Begin with 5-10 minute sessions every other day, then increase duration by 5-minute increments weekly if you maintain daily hygiene without discomfort. This approach reduces enamel stress by 50% compared to full-duration protocols.
If sensitivity appears, immediately shorten sessions by 50% and pause treatments for 2-3 days. Start with 10% lower peroxide concentrations, incrementing by 5% every 3-4 sessions while monitoring for 24-hour post-treatment reactions. Apply desensitizing gel one week before your first session and follow each treatment with remineralizing rinse.
Limit initial frequency to three weekly sessions, gradually building to daily use over two weeks. Schedule professional cleanings before starting to optimize enamel condition.
Monitor Sensitivity Between Sessions
Strategic sensitivity monitoring between whitening sessions determines treatment success and prevents the complications that force 40% of users to abandon their protocols prematurely. Track your sensitivity levels systematically to optimize treatment intensity and frequency.
Essential monitoring protocols:
- Start desensitizing toothpaste containing potassium nitrate two weeks before treatment to block pain signals
- Apply professional fluoride treatments to fortify enamel before and during whitening sessions
- Eliminate acidic foods and beverages that compromise enamel integrity between applications
- Avoid extreme temperatures for 24-72 hours post-treatment, consuming only lukewarm foods
- Take over-the-counter NSAIDs as directed when discomfort occurs
Consult dentist about sensitivity if discomfort persists beyond one week, as most cases peak within 24 hours. Your dental professional can recommend reduced exposure times or gradual whitening approaches for naturally sensitive teeth.
Avoid Overuse to Protect Your Enamel
Excessive use of LED teeth whitening kits compromises enamel integrity through a process called demineralization, where prolonged exposure to bleaching agents strips essential minerals from the tooth surface. This mineral depletion increases porosity, weakens protective properties, and elevates cavity risk.
Clinical studies demonstrate that overuse reduces enamel microhardness while increasing surface roughness, creating irreversible structural damage.
To maintain enamel health, practice moderate frequency by adhering strictly to manufacturer guidelines and consulting your dentist for personalized treatment intervals. Professional supervision guarantees appropriate peroxide concentrations for your specific enamel thickness and oral health status.
If sensitivity develops, discontinue treatments immediately and switch to lower-concentration formulations. Avoid excess applications between sessions, as enamel can’t regenerate once damaged.
Strategic spacing between whitening cycles allows remineralization, preserving structural integrity while achieving desired aesthetic outcomes through controlled, evidence-based application protocols.
Maintain Results by Avoiding Staining Foods and Drinks
Following LED teeth whitening treatments, your enamel becomes temporarily more porous and vulnerable to chromogens—pigmented molecules that penetrate the tooth surface and compromise your newly achieved brightness.
To preserve treatment outcomes, implement these evidence-based dietary modifications:
- Reduce dark beverage consumption for 48-72 hours post-treatment, including coffee, tea, red wine, and cola—all containing tannins and pigments that bind persistently to enamel
- Maintain ideal enamel pH by avoiding citrus fruits, tomato-based sauces, and vinegar for 1-2 weeks, as acidity weakens protective layers
- Limit deeply pigmented foods like berries, beets, and curry-based dishes that stain porous surfaces
- Use straws when consuming unavoidable chromogenic beverages to minimize direct tooth contact
- Eliminate sugary sodas and processed foods that promote plaque accumulation and subsequent discoloration
Understand Realistic Expectations for Shade Improvement
While protecting your investment through dietary modifications maximizes treatment longevity, understanding what LED teeth whitening can realistically achieve prevents disappointment and guides informed decision-making. Expected whitening results typically range from 4 to 6 shades lighter, though professional treatments can deliver up to 8 shades in 30 minutes. You’ll see immediate improvements of approximately 1.8 units ΔEab color change, with yellowish stains responding more favorably than gray or inherent discoloration.
Tooth anatomy considerations profoundly influence outcomes. Your enamel thickness and individual tooth structure affect peroxide penetration and whitening response. Initial tooth color determines your maximum achievable results—severely stained teeth may require multiple sessions.
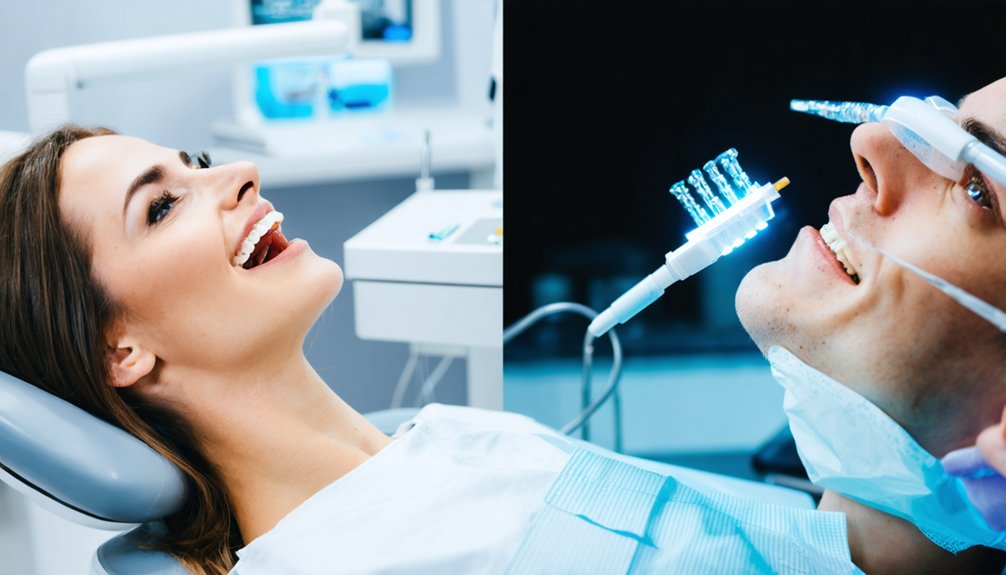
Professional treatments using 25-35% hydrogen peroxide outperform over-the-counter products containing 3-10% concentration. Results persist 12-24 months depending on maintenance habits.
Frequently Asked Questions
Do LED Lights Actually Speed up Whitening or Is It Just the Gel?
Want faster results? LED lights provide modest immediate whitening acceleration when combined with gel, though product concentration and formulation affect whitening effectiveness more considerably. However, you’ll likely experience color relapse from dehydration, making LED’s long-term benefits doubtful.
How Long Do Whitening Results Typically Last Before Needing Retreatment?
LED whitening results typically last several months to one year with proper whitening maintenance. You’ll extend these effects through good oral hygiene and dietary modifications. Follow dental checkup recommendations every six months to monitor your tooth health and plan retreatment timing.
Can LED Teeth Whitening Kits Damage Enamel With Repeated Use?
Yes, repeated use can damage enamel through excessive peroxide exposure and improper application technique. You’ll experience enamel sensitivity and microhardness loss if you exceed recommended twice-yearly treatments. Professional supervision guarantees you’re maintaining safe whitening intervals.
Are Professional Treatments Worth the Extra Cost Compared to At-Home Kits?
Professional treatments deliver superior results when you’re comparing dentist supervision benefits against unsupervised products. Your cost-benefit analysis should weigh faster outcomes and reduced sensitivity risks versus multiple at-home kit purchases, particularly for severe discoloration cases.
When Will I Start Seeing Visible Whitening Results From My Kit?
You’ll notice immediate whitening effects within the first few days as surface stains lift. Clinical studies show gradual whitening progress continues over 1-2 weeks, with ideal results appearing by week four through consistent daily treatments.