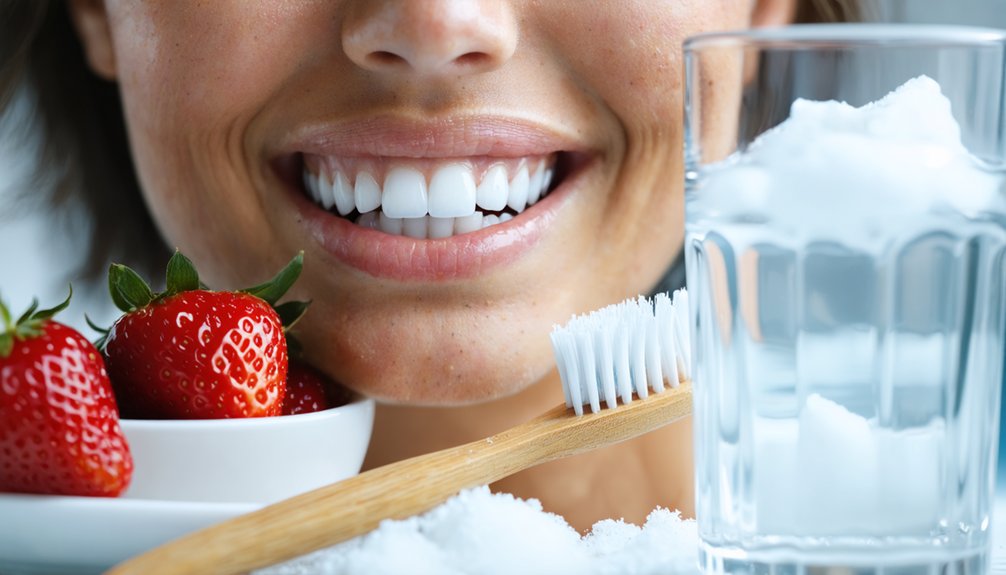
You’ll find enamel-safe whitening through professional Philips Zoom! laser treatments using calibrated 25% hydrogen peroxide, custom dentist trays with 10-44% carbamide peroxide, supervised in-office applications at controlled concentrations, and FDA-approved strips containing 6-14% peroxide. Permanent solutions include porcelain veneers and enamel microabrasion removing 0.1-0.3mm of surface discoloration. You’ll need fluoride-containing whitening toothpastes with low-abrasive silica, composite bonding replacements after bleaching, and intracoronal techniques for non-vital teeth. The specific protocols, treatment durations, and concentration thresholds determine your enamel’s structural integrity throughout each whitening approach.
Key Takeaways
- Professional laser whitening with 25% hydrogen peroxide achieves 8-shade improvement while protecting enamel through calibrated pH levels.
- Custom dentist trays using 10-44% carbamide peroxide provide controlled release for safe, gradual whitening over weeks.
- Dentist-supervised treatments with appropriate peroxide concentrations guarantee enamel-safe formulations through proper oral examination and monitoring.
- ADA-approved whitening toothpastes combine low-abrasive agents with fluoride for stain removal while strengthening and remineralizing enamel.
- Porcelain veneers offer permanent whiteness through non-porous ceramic that resists staining without requiring peroxide-based bleaching agents.
Professional Laser Teeth Whitening (Philips Zoom!)
Professional laser teeth whitening with Philips Zoom! represents the most requested in-office whitening system in the United States, delivering measurable results through a controlled clinical process. The treatment utilizes 25% hydrogen peroxide gel activated by LED technology, with variable lamp settings that allow your dentist to adjust laser intensity based on your specific sensitivity threshold. You’ll complete three 15-minute cycles within a 45-minute appointment, achieving up to eight shades of improvement in one session.
The system’s peroxide pH levels remain calibrated to protect enamel integrity while oxygen molecules penetrate and break down chromogenic compounds. Your treatment includes protective barriers for soft tissues, post-procedure fluoride application to strengthen enamel, and custom take-home trays. Professional cleaning before whitening optimizes effectiveness and guarantees uniform shade improvement.
Custom-Fitted Dentist Trays With Carbamide Peroxide
Custom-fitted trays deliver carbamide peroxide gel directly to tooth surfaces through professionally fabricated appliances molded from dental impressions. Your dentist will determine the appropriate concentration—typically 10-20% carbamide peroxide—based on your enamel condition, sensitivity threshold, and desired whitening timeline.
This system allows controlled hydrogen peroxide release over extended periods, with treatment protocols ranging from two weeks to several months depending on stain severity and individual response.
How Custom Trays Work
When you choose dentist-provided whitening trays, you’re receiving a system that relies on precise dental impressions to create an exact replica of your unique tooth anatomy. Tray fabrication precision begins with impression material that captures every contour of your teeth, which is then converted into a stone model through controlled agitation processes.
This model undergoes vacuum-forming with heated plastic material that’s pulled onto the teeth structure, ensuring custom tray customization for your specific dental architecture.
The finished trays feature built-in reservoirs that maintain ideal gel-to-tooth contact while minimizing gum exposure—a critical distinction from over-the-counter alternatives. You’ll control wear duration based on gel concentration: lower strengths (10% carbamide peroxide) allow 8-10 hour application, while higher concentrations (35-45%) require just 15-60 minutes daily. Results typically appear within one to two weeks.
Concentration Levels and Safety
Dentist-dispensed carbamide peroxide systems typically range from 10% to 44% concentration, with selection determined by your staining severity, enamel integrity, and baseline sensitivity threshold. Lower concentrations (10-16%) suit maintenance or sensitive teeth, while 20-44% accelerate chromogen oxidation under professional oversight.
Research demonstrates that 30% carbamide peroxide achieved 13 shade guide units in five days, though 10-16% concentrations ultimately matched higher concentrations’ efficacy with slower relapse rates. Your custom-fitted trays incorporate 0.5-1.0mm reservoirs that enhance gel retention while minimizing soft tissue contact—critical for sensitivity management with higher concentrations.
Higher concentrations release hydrogen peroxide faster, increasing transient sensitivity risk. Professional supervision guarantees appropriate concentration selection based on your pre-existing conditions, monitors tissue response, and adjusts protocols to prevent gum exposure while maximizing chromogen oxidation efficiency.
Treatment Duration and Results
Most treatment protocols with dentist-dispensed carbamide peroxide trays require 4 to 8 hours of daily wear, typically scheduled during sleep when reduced saliva production minimizes gel dilution and maximizes chromogen contact time. You’ll observe initial shade changes after three to four days, with complete cycles spanning 10 to 15 days for visible results.
Whitening efficacy parallels professional outcomes: 6% hydrogen peroxide achieves comparable lightening to 10% carbamide peroxide but requires only 7 hours versus 140 hours total treatment time. Continued whitening occurs for 24 to 48 hours post-application as peroxide remains active within tooth structure.
Expect two to eight shades lighter depending on baseline color and protocol intensity. Results typically persist 6 months to 2 years with disciplined aftercare, though maintenance touch-ups extend longevity.
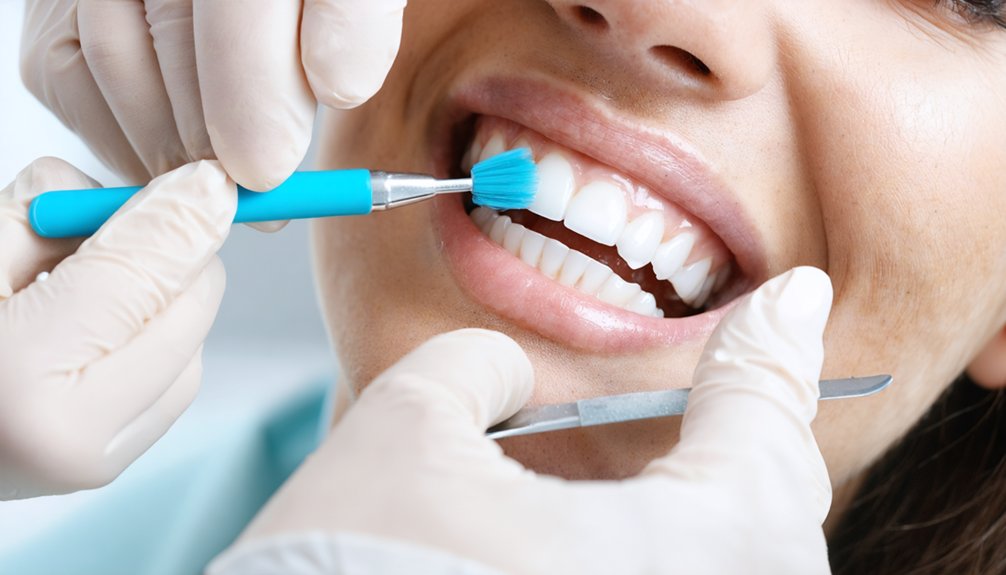
In-Office High-Concentration Hydrogen Peroxide Treatment
In-office hydrogen peroxide treatments deliver 35-40% concentrations under professional supervision, vastly exceeding the 10% maximum available in store-bought products. Your dentist applies protective barriers to gums and surrounding tissues before administering the gel in controlled 15-20 minute sessions, often enhanced with light activation technology.
This supervised approach achieves rapid whitening—typically at least one Vita shade improvement—while minimizing enamel damage risks through precise application timing and protective protocols.
Professional-Grade Peroxide Concentrations
Professional whitening treatments delivered under dental supervision rely on hydrogen peroxide concentrations ranging from 20% to 45%, vastly exceeding the 6% threshold recommended for unsupervised home use. While 35% formulations produce immediate shade changes of 3.68—outperforming lower peroxide concentrations by 1.31 shades—research indicates 15% represents the maximum effective concentration for preventing enamel morphological changes. Higher concentrations don’t improve whitening outcomes beyond this threshold.
You’ll find that lower peroxide concentrations demonstrate superior color retention: 6% solutions maintain 82% of initial improvement at six months versus 46% retention with 35% formulations. Health Canada restricts professional treatments to 25% hydrogen peroxide maximum, while the ADA mandates professional supervision for anything exceeding 6%. Understanding these higher peroxide safety considerations enables informed treatment decisions that balance efficacy against potential enamel compromise.
Protective Measures and Results
Although high-concentration hydrogen peroxide treatments deliver superior whitening outcomes, they require specific protective protocols to minimize transient side effects. Your dentist will apply gum barriers during the procedure and may prescribe desensitizing agents if you have sensitive teeth whitening concerns. Disclose any pre-existing sensitivity before treatment initiation to enable protocol adjustments.
Expect visible results after one session, with hydrogen peroxide achieving ΔE=9.6 color difference—the most effective whitening agent accessible. Temporary tooth dehydration occurs during application but resolves through natural salivary processes. For ideal recovery, focus on rehydrating tooth enamel by avoiding stain-enhancing beverages during the 48-hour rehydration phase. Results typically last 6 months to 2 years, with custom tray touch-ups extending longevity considerably. Your dentist controls application parameters to prevent overuse and safeguard enamel integrity.
Take-Home Dentist-Supervised Whitening Kits

When you’re seeking professional-grade whitening results without the commitment of multiple dental visits, take-home dentist-supervised kits offer a clinically validated middle ground between over-the-counter products and in-office treatments. You’ll receive custom-fitted trays designed to minimize custom tray discomfort while delivering professional-strength carbamide peroxide (typically 35%) or hydrogen peroxide gel directly to your enamel.
Your dentist determines appropriate concentrations based on your oral examination, identifying contraindications like pre-existing dental work or conditions that might trigger unexpected whitening sensitivity.
These kits enable you to control treatment timing through 10-minute sessions over 5-10 days, producing measurable results—potentially 5-8 shades lighter—within one to two weeks. The supervised approach guarantees you’re using enamel-safe formulations with proper application protocols, reducing risks while maintaining treatment efficacy on your schedule.
Over-the-Counter Whitening Strips and Gels
Over-the-counter whitening strips contain lower peroxide concentrations (typically 6-14%) compared to professional treatments, which limits their effectiveness but reduces enamel exposure to bleaching agents. You’ll experience whitening results lasting three to six months with these products, requiring repeated applications to maintain shade improvement.
However, your technique profoundly impacts both safety and outcomes—improper strip placement or extended wear times can cause gum irritation, uneven whitening, and unnecessary enamel stress.
Lower Peroxide Concentration Levels
Since professional whitening treatments can pose enamel risks at high peroxide concentrations of 35-40%, over-the-counter strips and gels offer a more conservative approach with formulations containing 10-22% hydrogen peroxide or 3-15% carbamide peroxide. These peroxide concentration ranges considerably reduce demineralization risk while maintaining whitening efficacy through controlled oxidation of enamel and dentin pigments.
Carbamide peroxide—an alternate peroxide ingredient—breaks down into hydrogen peroxide upon saliva contact, providing gentler delivery. When you apply these products for 30 minutes to one hour daily over 1-2 weeks, you can expect 1-2 shade improvements on mild-to-moderate stains. Research demonstrates negligible enamel erosion and no microhardness changes at these concentrations. However, you should anticipate higher tooth sensitivity compared to non-peroxide alternatives, though intensity remains lower than professional treatments.
Temporary Whitening Effect Duration
Understanding efficacy timelines proves equally important as selecting appropriate peroxide concentrations for your whitening regimen. You’ll observe initial improvements within three to seven days of consistent application, though complete results require fourteen to twenty-eight days depending on stain severity.
Whitening strips deliver visible outcomes lasting three to six months with proper protocol adherence. However, temporary results fade due to dietary exposure and natural enamel characteristics, necessitating strategic intervention. Long lasting maintenance required includes reapplication every four to six weeks to preserve achieved whiteness levels.
Dentist-supervised gel trays extend duration up to twelve months, while over-the-counter alternatives typically maintain efficacy for two to four months. You must establish realistic expectations regarding treatment sustainability and commit to scheduled maintenance protocols for ideal enamel-safe whitening outcomes.
Proper Application Technique Matters
While selecting appropriate whitening products establishes the foundation for safe treatment, executing proper application technique determines whether you’ll achieve excellent results without compromising enamel integrity. Proper strip alignment begins with completely dry teeth—moisture reduces adhesiveness and gel efficacy. Position strips precisely along the gumline, ensuring the gel contacts only enamel surfaces while avoiding gum tissue overlap. Press firmly to eliminate air bubbles and fold excess material behind teeth for complete coverage.
You’ll maximize safety by adhering strictly to manufacturer-specified wear times, typically 30 minutes daily. Never extend duration or double-up applications, as overuse accelerates enamel weakening and sensitivity. After removal, wait 30-60 minutes before brushing to allow enamel remineralization. Rinse thoroughly to remove residual gel, and avoid staining substances immediately post-treatment for perfect protection.
Whitening Toothpastes With Mild Abrasives and Fluoride
How can you achieve a brighter smile without compromising your enamel’s integrity? Whitening toothpastes with mild abrasives and fluoride offer controlled, evidence-based solutions. Select formulations containing hydrated silica or calcium carbonate—these provide daily stain removal without excessive enamel wear. Vitally, verify fluoride presence: sodium fluoride (0.15% w/v fluoride ion) or sodium monofluorophosphate (1450PPM maximum) delivers enamel strengthening minerals that remineralize acid-weakened surfaces.
Clinical evidence supports combining low-abrasive agents with fluoride for dual action: gentle polishing removes surface discoloration while fluoride incorporation prevents demineralization. ADA-approved options like Sensodyne Clinical White and Crest 3D White Brilliance Pro demonstrate measurable stain reduction without structural damage. Avoid charcoal-based products—their high abrasivity compromises enamel permanently. Choose formulations explicitly labeled “enamel-safe” with documented low RDA (Relative Dentin Abrasivity) values for sustainable whitening under your direct control.
Porcelain Veneers for Permanent Whiteness

Porcelain veneers deliver permanent whiteness through their non-porous ceramic composition, which fundamentally differs from natural enamel’s structure. You’ll retain the selected shade indefinitely since peroxide-based bleaching agents can’t penetrate the material. However, veneer porosity varies by material—composite resin alternatives absorb stains faster than porcelain options.
You must address cement discoloration separately, as the bonding adhesive’s porous nature allows gradual staining that shows through translucent veneers. Professional polishing restores surface gloss without changing the underlying shade. Complete replacement becomes necessary when cement degradation compromises appearance beyond surface-level correction.
Crucially, you should whiten natural teeth before veneer placement. Once bonded, veneers won’t respond to subsequent whitening treatments, potentially creating shade mismatches with treated natural teeth. Strategic pre-treatment planning guarantees long-term aesthetic control.
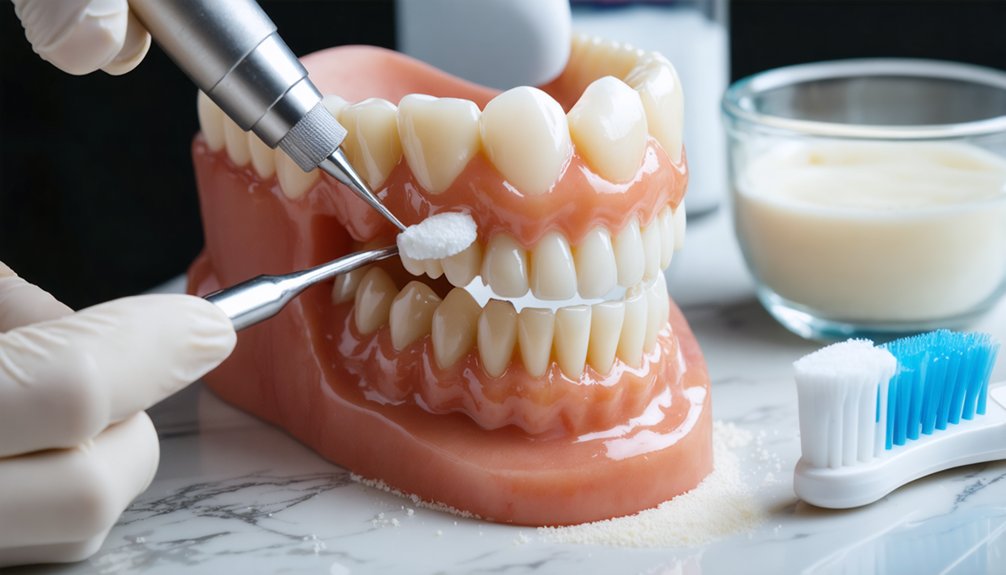
Enamel Microabrasion for Surface Stain Removal
Enamel microabrasion removes superficial discoloration through controlled mechanical-chemical erosion, eliminating 0.1-0.3mm of compromised surface enamel in a single appointment. You’ll benefit from enamel preservation benefits as this non-invasive procedure addresses yellow-brown stains, fluorosis, and post-orthodontic white spots without harsh chemicals. The treatment involves applying acidic-abrasive paste like Opalustre at 500 RPM, creating a lustrous, glass-like surface that resists bacterial colonization.
However, you must understand stain removal limitations. The procedure only addresses surface-level discoloration within the superficial enamel layers—deep staining requires alternative interventions. You can enhance results by combining microabrasion with carbamide peroxide bleaching, though you’ll need to sequence treatments appropriately. Wait two weeks after whitening before pursuing aesthetic restorations. This technique works best when your discoloration doesn’t exceed 0.3mm depth.
Composite Bonding and Crown Treatments

While surface-level interventions address natural enamel staining, restorative materials like composite bonding and porcelain crowns present distinct whitening challenges that require alternative management strategies. You’ll need to understand that composite resin doesn’t respond to hydrogen peroxide or carbamide peroxide bleaching agents because these materials aren’t porous like natural enamel.
When you whiten teeth with existing bonding, only natural tooth structure lightens, creating visible color mismatches. Professional polishing can remove surface stains from bonding, but you’ll require minimally invasive bonding replacement to match newly whitened teeth. Always complete whitening treatments first, then wait two weeks before placing new composite to guarantee proper adhesion and color matching.
Composite resin repair techniques may restore appearance without full replacement. Strong whitening products can damage bonding surfaces, increasing future staining susceptibility.
Intracoronal Bleaching for Non-Vital Teeth
When trauma or endochronic treatment causes intrinsic discoloration in non-vital teeth, you’ll need specialized intracoronal bleaching techniques that target staining from within the pulp chamber rather than external enamel surfaces. The walking bleach technique achieves ideal results by sealing sodium perborate with 30-35% hydrogen peroxide inside your tooth between weekly sessions.
You must establish proper isolation with rubber dam and place a 1mm glass ionomer barrier 2mm below the gingival margin to prevent hydrogen peroxide penetration into periradicular tissues. Understanding tooth discoloration etiology determines treatment duration—typically 3-6 sessions yield satisfactory shade matching.
Apply calcium hydroxide paste post-treatment to neutralize pH and prevent cervical resorption. Wait two weeks for color stabilization before placing final composite restorations. Confirm adequate apical seal via radiograph before initiating treatment.
Frequently Asked Questions
How Long Does Tooth Sensitivity Last After Whitening Treatments?
Picture your teeth gradually calming after treatment—you’ll typically experience whitening sensitivity duration of 24-72 hours. However, if discomfort persists beyond one week, you should seek professional evaluation. Effective whitening sensitivity management includes desensitizing toothpaste and avoiding temperature extremes.
Can I Whiten My Teeth if I Have Existing Fillings or Crowns?
You can whiten teeth with existing fillings or crowns, but dental material compatibility prevents restorations from changing shade. Consider underlying dental conditions first, then whiten natural teeth before replacing restorations to match your new color.
What Should I Avoid Eating After a Whitening Treatment?
Your teeth are like a sponge post-whitening. You’ll need to avoid acidic foods and avoid staining beverages for 48 hours minimum. This prevents compromising your results and protects temporarily vulnerable enamel from irreversible discoloration.
Are There Ways to Prevent Sensitivity Before Whitening?
Yes, you can prevent sensitivity by using desensitizing toothpaste containing potassium nitrate for two weeks before treatment and requesting your dentist apply topical fluoride. These evidence-based interventions strengthen enamel and reduce nerve reactivity during whitening procedures.
How Often Can I Safely Repeat Whitening Treatments?
You can safely repeat professional whitening every 6-12 months to maintain long-term whitening efficacy without compromising enamel integrity. Adhering to maximum recommended frequency intervals prevents cumulative sensitivity and structural damage, giving you controlled, sustainable results.